In part 1 of this article, you learned how to setup JSCAPE MFT Server so that it could run an Avast Antivirus auto-scan on each newly uploaded file. Just like all antivirus programs, Avast! for Linux/Unix Servers can only be truly effective if its virus database is up-to-date
New viruses are created as we speak, so if your antivirus is not updated and the file you just uploaded is infected by one of those new viruses, that virus will be able to carry out its malicious activities in your system undetected.
So here in Part 2, we’ll show you how to configure managed file transfer server so that it can initiate a scheduled Avast virus database update. As mentioned in Part 1, Avast! for Linux/Unix Servers is already capable of carrying out automatic updates. However, just in case you have your own reasons for wanting to set your own scheduled updates, then this is one way of doing it.
Once again, triggers play a crucial role here. We need to create a trigger that would activate every time a specified time is reached. Let’s say we want it to perform an update at 10:30 PM of every day.
Go now to your Triggers node and create a new trigger by clicking the Add button.

Give your new trigger a name (e.g. Avast Virus Scan Update). For the Event Type, select Current Time. When you’re done, click Next.

>
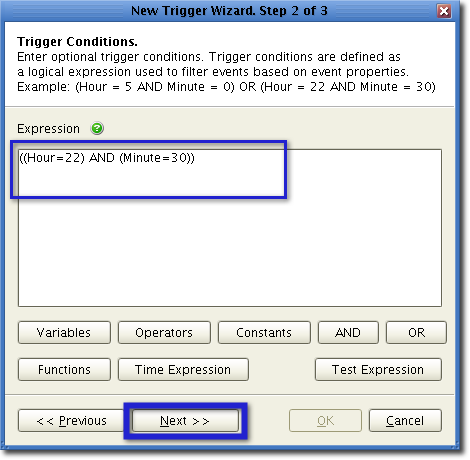
When specifying a time in the Trigger Conditions screen, base your values on a 24-hour clock. So if you want your Avast antivirus database to be updated every 10:30 PM, then the time you need to enter is 22:30. Enter this into the Expression box:
((Hour=22) AND (Minute=30))
Click Next when done.
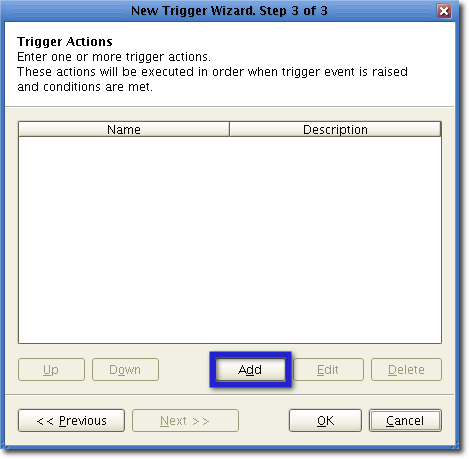
Add a new trigger action by clicking the Add button.
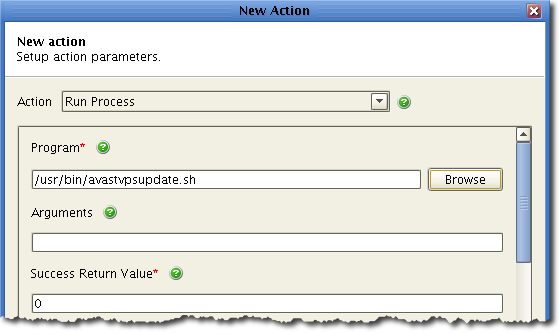
Again, select Run Process from the Action drop-down list. Next, enter this string of text in the Program field.
/usr/bin/avastvpsupdate.sh
“avastvpsupdate.sh” is the command used when carrying out an Avast virus database update via the terminal. This command-line program does not require any arguments, so leave the Arguments field blank. Also, leave the Success Return Value as is.
Just like in Part 1, specify log files for both the Output Stream and Error Stream fields, and make sure the Log Action check box is checked. Click OK.
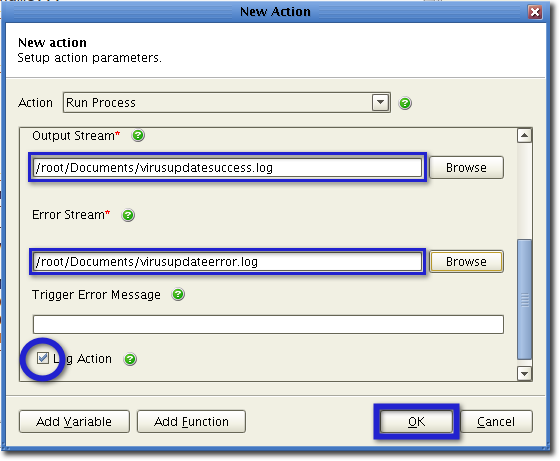
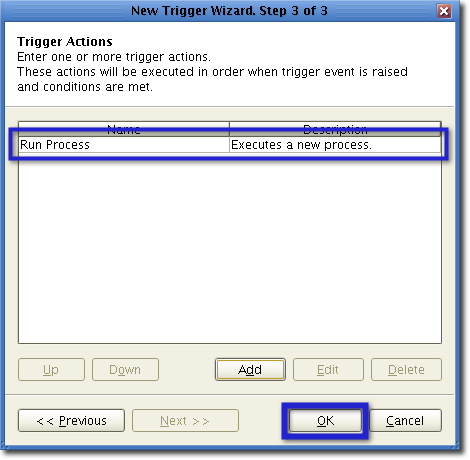
Once the new trigger action has been added to the Trigger Actions list, click OK.
After that, you should be able to see your newly created trigger in your Triggers node. Click the Apply button to make sure your settings take effect.
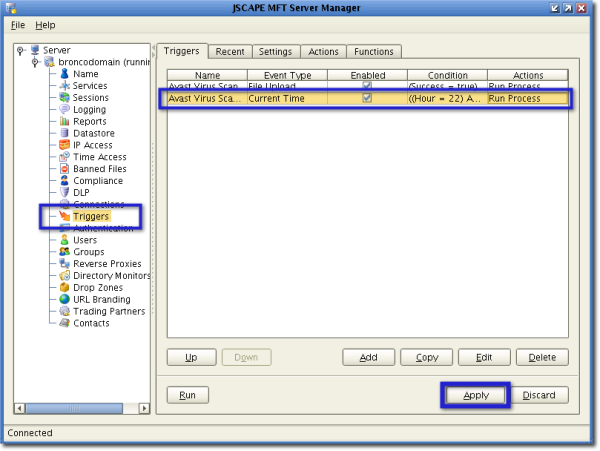
You can check whether the trigger will actually execute the Avast antivirus database update by clicking the Run button located to the left of the Apply button (see screenshot above).
Here’s what we saw in the JSCAPE MFT Server Manager Logging screen after clicking that button.
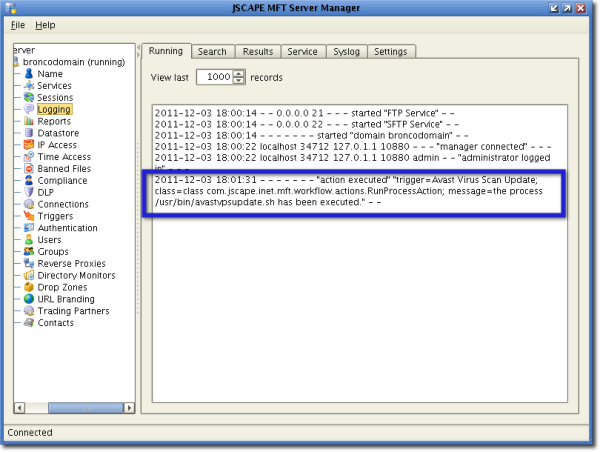
As you can see, the avastvpsupdate.sh command executed. Remember that this is the command responsible for carrying out the Avast virus database update. That means, our trigger works!


