Learn to create client certificates via OpenSSL or JSCAPE MFT Server for secure SSL/TLS authentication and file transfers.
When we use Transport Layer Security (TLS), we typically do so to protect our data while transmitting it over the network and to ensure that our users are connecting to the right server. These two operations, i.e., data-in-transit encryption and server authentication, rely on a TLS artifact known as the server certificate. That being said, TLS also supports another operation that uses a different type of digital certificate. It’s called client certificate authentication, and it relies on client certificates.
Note: Even if Secure Sockets Layer is already considered obsolete and has largely been replaced by TLS, most people still use the term “SSL” for TLS-related artifacts and processes. So, in this post, we’ll be using “SSL/TLS” to accommodate readers who haven’t moved on from SSL yet.
Although client certificate authentication is a less-known SSL/TLS feature, it’s become increasingly popular in organizations that are striving to improve their security posture. We already discussed this topic in detail in the blog post “What is client certificate authentication?” However, we didn’t include the steps of actually creating a client certificate. That’s going to be the main focus of this post.
In this post, you’ll find two tutorials. The first tutorial teaches you how to create a client certificate in the command line using OpenSSL. The second shows you how to do it in substantially fewer steps using JSCAPE MFT Server by Redwood.
JSCAPE MFT Server is a managed file transfer server that enables you to deliver secure file transfer services using SSL/TLS-secured protocols such as Hypertext Transfer Protocol (HTTPS), FTP-SSL (FTPS) and Applicability Statement 2 (AS2). It’s compatible with all major platforms, including Windows, macOS, Linux and UNIX.
If you want to know more about JSCAPE MFT Server, schedule a demo now.
Before we proceed with the tutorials, allow us to share a couple of sample use cases involving client certificates and client authentication.
Samples use cases for client certificate authentication
Two-factor authentication (2FA) in secure file transfers
SSL/TLS-equipped file transfer protocols, such as HTTPS and FTPS, allow you to implement 2FA by combining client certificate authentication with password-based authentication. Here’s a quick example demonstrating what happens when a user attempts to connect to an HTTPS file transfer server running on JSCAPE MFT Server with SSL/TLS client authentication enabled.
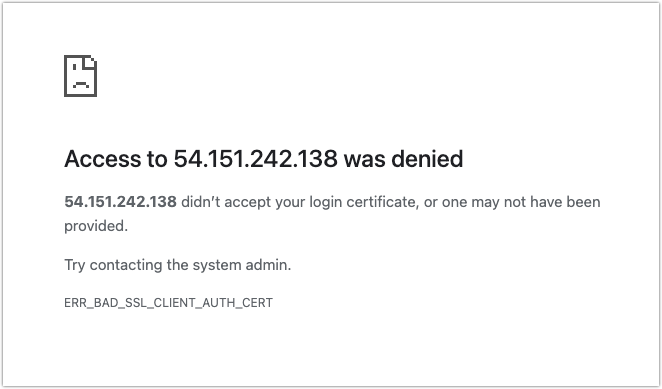
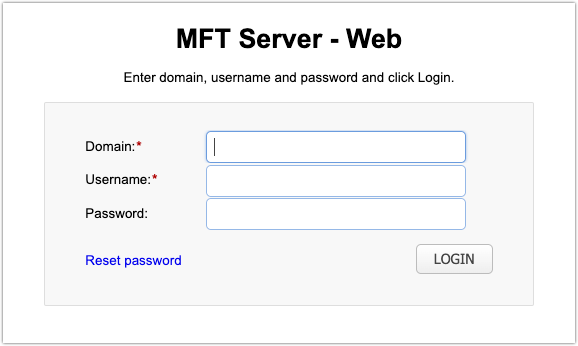
If the user connects through a web browser without the right client certificate, access is outright denied. The user isn’t even allowed to go through the login process.
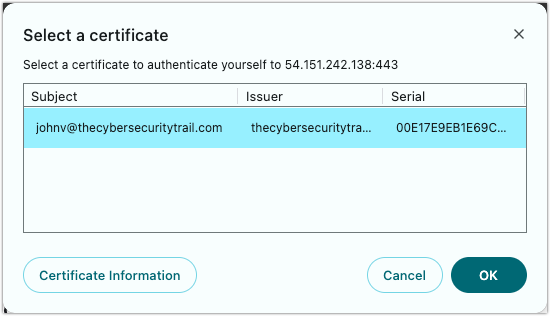
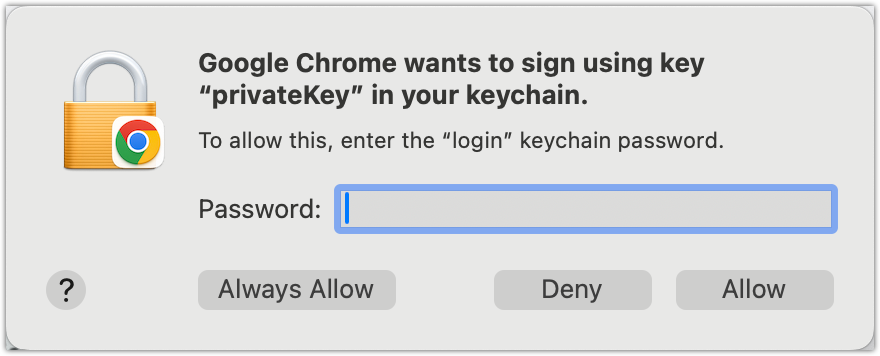
Once the user’s client certificate is loaded in the browser, however, the server prompts the user to select the TLS/SSL certificate and digitally sign it using the private key associated with that cert.
The user goes through this validation process only once. In succeeding connection attempts, the client certificate authentication process takes place in the background and the user is then allowed to login as usual.
In effect, the user is required to submit two credentials before being granted access: their client certificate and their username/password. Only after both credentials have been submitted is the user granted access. This 2FA process, which is similar to the password-public key authentication combination used in the SSH (Secure Shell) File Transfer Protocol SFTP), can significantly mitigate the risk of unauthorized access.
Securing a private API hosted on Microsoft Azure API Management
Some businesses host private APIs on the Azure API Management service. To ensure that only authorized applications can access their hosted API, businesses sometimes require client certificate authentication. Each application is provided with a client certificate and a private key, and then each private key’s corresponding public key is uploaded to Azure API management.
Once the API’s authentication policy is configured to require client certificates, connecting applications are only allowed to access the API if they are able to submit a valid certificate.
Alright, now that you have an idea of how organizations use client certificate authentication, let’s proceed with the two tutorials we promised earlier. Let’s start with the more challenging one.
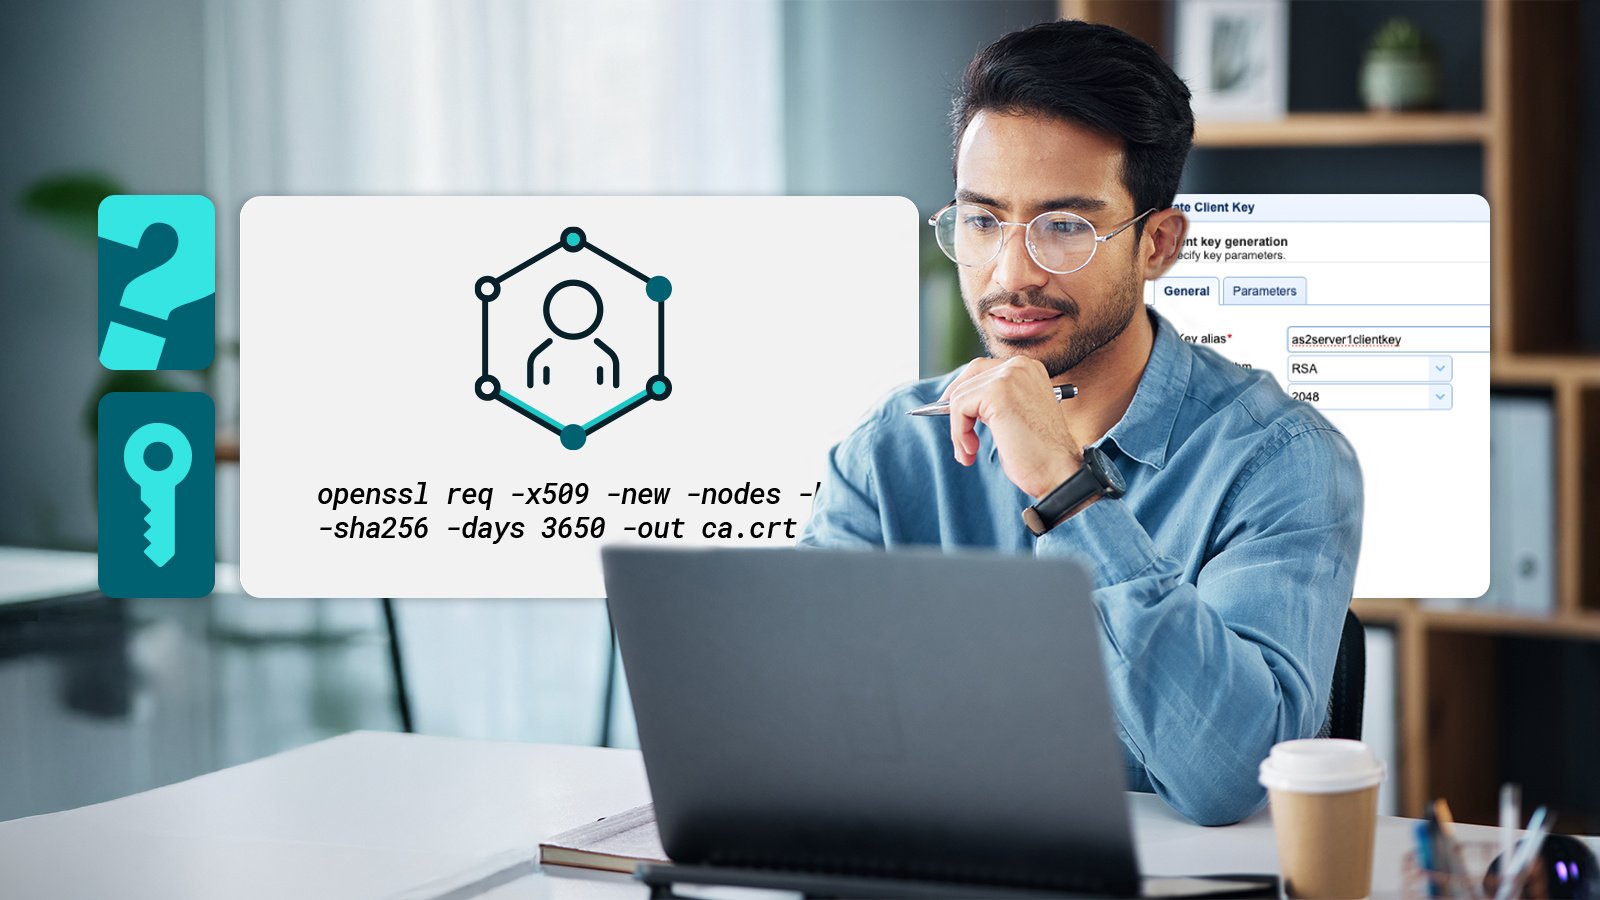
How to create a client certificate using OpenSSL
Let’s now go over the steps for creating a client certificate using OpenSSL. OpenSSL is a widely used open-source library that allows you to implement several cryptographic operations, including SSL/TLS certificate creation. It’s pre-installed in UNIX operating systems, such as macOS and various Linux distributions, so it’s easily accessible if you use these platforms.
The client certificate we’ll be creating is known as a self-signed certificate, wherein we’ll be digitally signing it with our own certificate authority (CA). In a production environment, you would normally have your digital certificate validated and signed by a duly recognized CA, such as DigiCert, GlobalSign and Entrust. But since I just want to walk you through the process of creating a client certificate, we can simply act as our own root certification authority.
Step 1: Set up a root certificate authority (CA)
To function as a CA, we need two artifacts — a root CA private key (or simply, CA private key) and a root CA certificate (or simply, CA certificate). To create the first of these two artifacts, run this command on your Linux or macOS terminal:
$ openssl genpkey -algorithm RSA -out ca.key -aes256
That command creates a CA private key that uses the RSA cryptographic algorithm, encrypts it using AES256 for added security, and then saves the output in a file named “ca.key.”
Note: If you’ve been reading other articles on the topic, you might have encountered a different command that begins with “openssl genrsa.” It’s a legacy command. While you can generate the same output using that command, the OpenSSL “genpkey” command is more recent and gives you more flexibility in generating private keys.
If you don’t know what RSA is, you can read the post: DSA vs. RSA encryption — which works best for file transfers?
Before the ca.key file is created, you’ll be prompted to enter a PEM pass phrase. Enter your desired phrase or password and then take note of it. You’ll need it in the next step. OpenSSL will use that passphrase to encrypt your private key through the AES-256 encryption algorithm.
Once your CA private key is ready, you can then use it to create a self-signed CA certificate by executing this command:
$ openssl req -x509 -new -nodes -key ca.key -sha256 -days 3650 -out ca.crt
That command creates a CA certificate that’s valid for 10 years and then saves it in a file named “ca.crt” using the X.509 format, which is the standard format used by SSL/TLS. Since this CA certificate creation process requires your private key, you’ll be asked to re-input the PEM passphrase you specified earlier. After that, you’ll be prompted to enter some pertinent information, such as:
- Your home country’s two-letter code
- Your home state or province
- Your home city
- Your organization name
- The name of your organizational unit
- Your organization’s fully qualified host name
- Your email address
Step 2: Generate the client private key and certificate
Now that you have your CA cert, you can use it to create a client certificate. Before you can do that though, you’ll have to generate a client private key first. Run the following command to create that key.
$ openssl genpkey -algorithm RSA -out client.key
As you probably guessed by now, the output of that command is a private key stored in a file named client.key.
You can use that key in the following command to generate a certificate signing request (CSR) for the client certificate.
$ openssl req -new -key client.key -out client.csr
Again, you’ll be prompted to enter information similar to the ones you entered earlier for the CA certificate. However, this time, the information should be related to whoever (in the case of a user) or whatever (in the case of host) will be using the client certificate. So, for example, if the client certificate is for a user, then the email address field should contain the user’s email address.
Towards the end of the client CSR creation process, you’ll be prompted to enter a challenge password. Take note of that password as well.
Next, you need to sign the client CSR using the CA key to finally create the client certificate. Execute this command to perform that action:
$ openssl x509 -req -in client.csr -CA ca.crt -CAkey ca.key -CAcreateserial -out client.crt -days 365 -sha256
Again, since this process requires your CA private key, you’ll be prompted to input that key’s passphrase again. Once the signing process completes, the new certificate is stored in the file “client.crt.” This file contains the client public key.
Although the client private key is already stored in client.key, most SSL/TLS client applications require private keys to be stored in PKCS#12 format. These are files that have the .pfx extension. To generate such a file, execute the following command:
$ openssl pkcs12 -export -out client.pfx -inkey client.key -in client.crt -certfile ca.crt
Here’s a summary of the files generated throughout the entire process:
| File name | Description | Purpose |
|---|---|---|
| ca.key | Contains CA private key | Used in creating the CA certificate, signing the client CSR and creating the client certificate |
| ca.crt | Contains CA certificate and CA public key | Used in generating the client certificate |
| client.key | Contains client private key | Used in creating the client CSR |
| client.csr | Contains the client CSR | Used in generating the client certificate |
| client.crt | Contains client certificate and client public key | Used in creating the client .pfx file. Also used by SSL/TLS servers in client certificate authentication |
| client.pfx | Contains client private key and other pertinent data | Used by SSL/TLS clients (e.g., web browsers) in client certificate authentication |
Using client certificates for client certificate authentication
Recall that client certificate authentication works using public-private key pairs. Thus, you need to import one key into one endpoint and the other key into the other endpoint. If you’ve been following the steps above, the client.crt file contains the public key, while the client.pfx file contains its associated private key.
So, for example, to implement the HTTPS file transfer set up we showed earlier, you need to import the public key to JSCAPE MFT Server instance and the private key into your HTTPS client. In this particular use case, that client would normally be a web browser, like Chrome, Firefox, Safari, Edge or Brave.
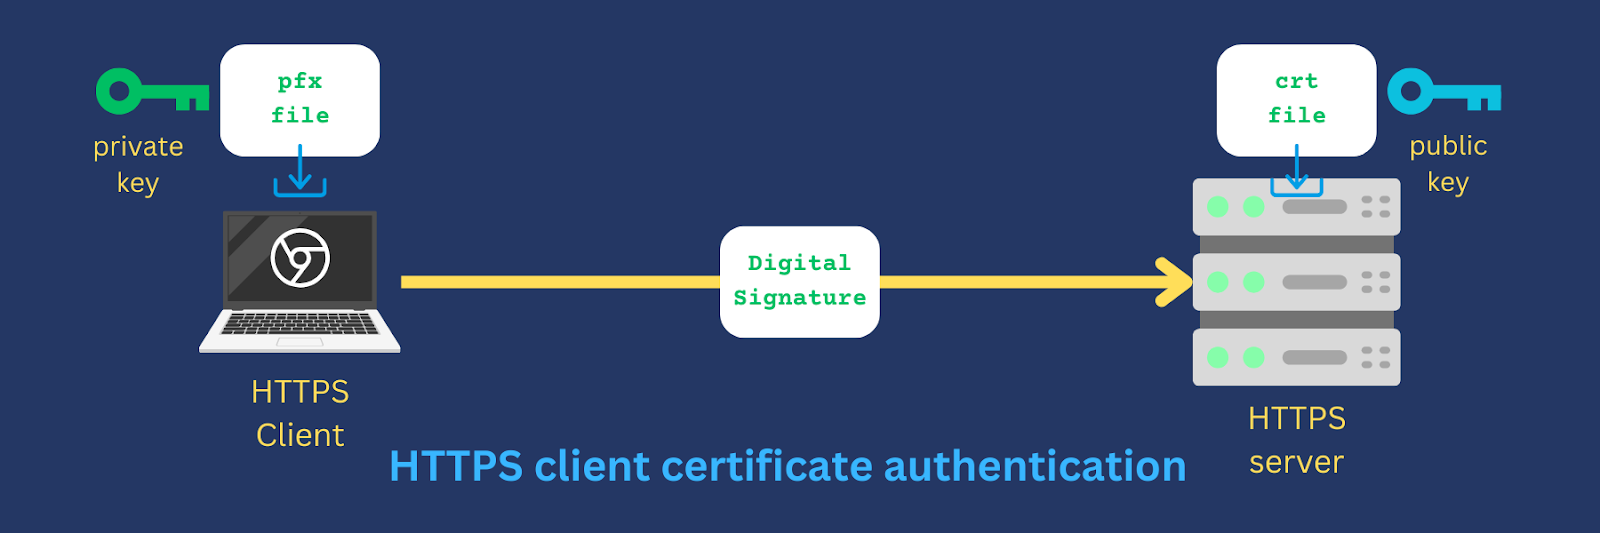
Let’s say you’re using Chrome. So, when you connect to your HTTPS file transfer service, your browser submits a digital signature generated using the private key in the imported client.pfx file. Your server then validates that signature using the public key in the imported client.crt file. The validation only succeeds if the private key in your browser and the public key in your server match.
Some people find the process of generating client certificates and all associated files through the command line too complicated. If you want to implement client certificate authentication for your secure file transfer environment but don’t want to deal with the command line, here’s an easier way.
How to generate a client certificate on JSCAPE MFT Server
JSCAPE MFT Server provides administrative functionality through a web-based application known as the MFT Server Manager. The MFT Server Manager has a graphical interface, so you can accomplish tasks on it with just a few clicks. For example, here’s how you would create a client certificate. This certificate can be used not only in HTTPS file transfers, but also in FTPS, AS2 and other file transfers that use TLS.
Recommended read: Setting Up client certificate authentication on an AS2 server
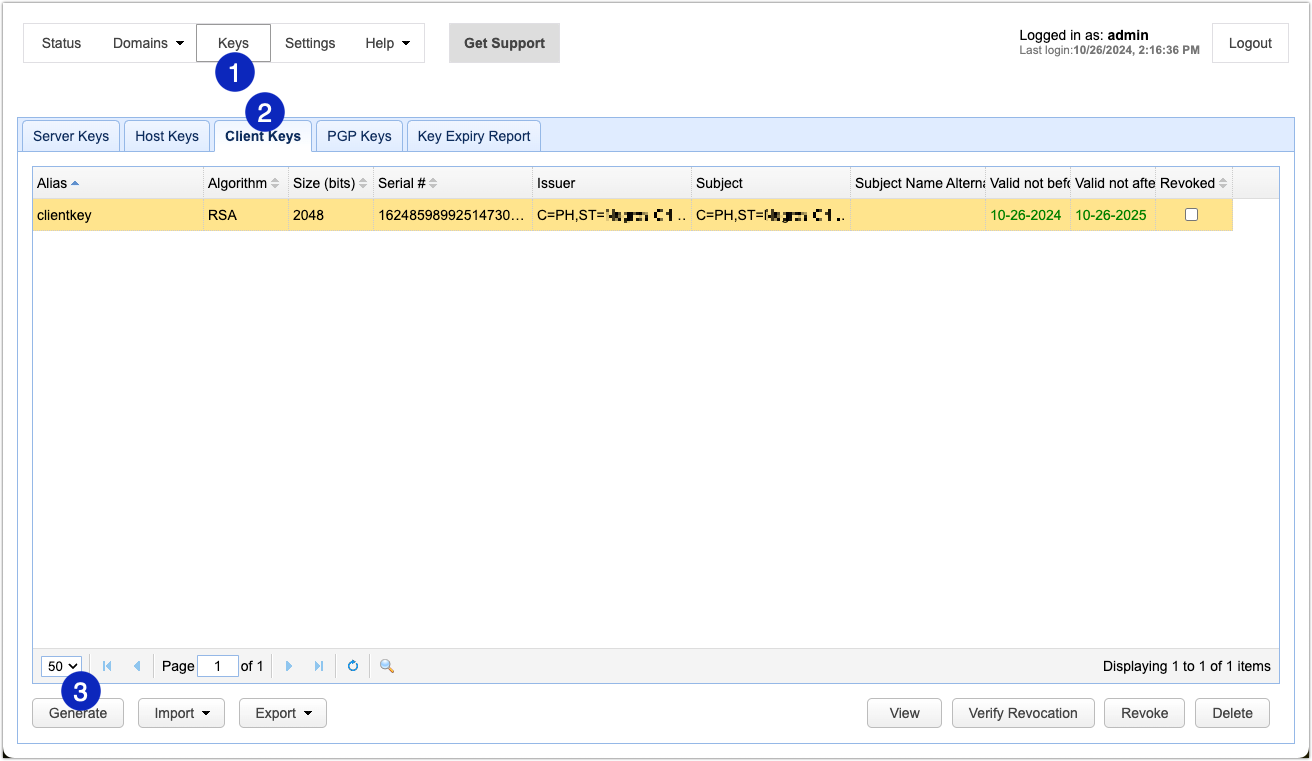
Log on to MFT Server Manager and navigate to Keys > Client Keys, and then click the Generate button.
Note: When used in this context, keys are typically embedded in digital certificates, so we’ll be using the terms “certificate” and “key” interchangeably here.
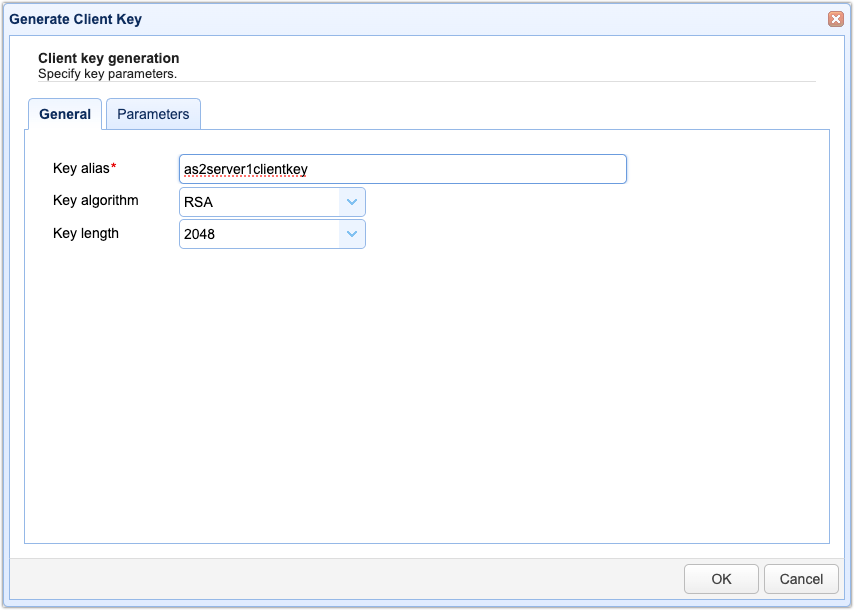
When the Generate Client Key dialog appears, go to the General tab and then enter your desired Key alias. This is just the name that you wish to associate with this particular client key in the JSCAPE MFT Server environment. You can use any alphanumeric string. For example, I’m calling mine “as2server1clientkey” because I’ll be using this same key for an AS2 server client certificate authentication tutorial I’m working on.
Choose a key algorithm, e.g., RSA, and a key length, e.g., 2048. If you’re not sure which algorithm to choose, read our blog post on RSA vs DSA. Also, if you’re not sure which key length to choose, check out our blog post, “How to choose encryption key lengths for file transfers.”
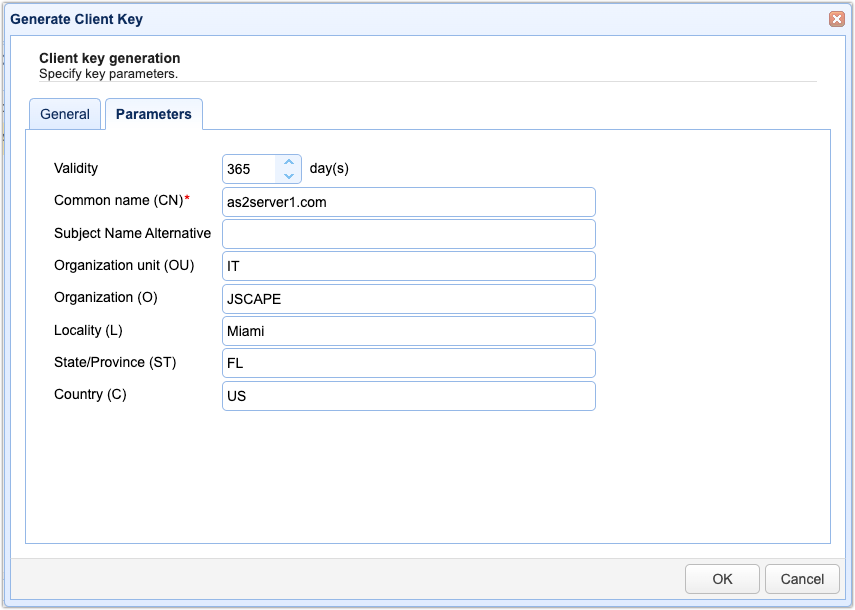
Move on to the Parameters tab and then fill out the form. These are the same fields you filled out in the command-line example we covered earlier. To review:
- Validity: Specify how many days you want your certificate to remain valid.
- Common name (CN): This is the name associated with this client-side certificate. If the client using this certificate will be manually operated by a person, then the usual practice is to enter that person’s email address. If it’s a machine, then use the hostname of that machine. Let’s use the key alias for this example.
- Subject Name Alternative: In this context, this is just the same as the CN, so we can leave it blank.
- Organization unit (OU): Indicates the specific unit in your organization that will use this key, e.g., Accounting or IT.
- Organization (O): The name of the user’s organization.
- Locality (L): The name of the user’s city.
- State/Province (ST): The name of the user’s state or province.
- Country (C): The user’s two-character country code, e.g., “US.”
Once you’re done, click OK.
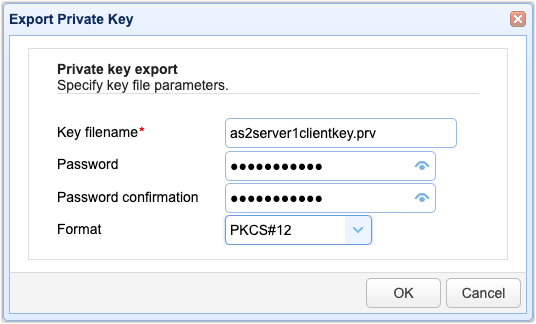
You’ll then be prompted to export this certificate’s private key. Specify a file name for the private key file. Enter a password as well to protect it. Lastly, specify a file format. In most cases, you’ll want to store this file in a PKCS#12 format because that’s the format most TLS clients require. Files in PKCS12 format are saved with the extension .pfx. When you’re done, click OK.
You should then see your newly created client certificate/key in your Client Keys tab.

In this post, we only focused on the creation of client certificates. If you want to know how to set up JSCAPE MFT Server to implement client certificate authentication, read the post “How to set up SSL/TLS client authentication.”
Care to try these steps yourself? Request a free trial of JSCAPE MFT Server now.
Other related posts:
How do digital certificates work? An overview
How to set up SFTP public key authentication on the command line
The SSH/SFTP key fingerprint and its role in server authentication
Why SHA2 certificates are imperative in secure file transfers