The ability to perform automated file transfers to a cloud-based storage solution like Dropbox can be a valuable asset to businesses who want to benefit from the scalability and cost-efficiency of the cloud or who simply need to transfer data to a trading partner’s online storage. If that’s something you can use, you can learn how to configure JSCAPE MFT Server to carry out scheduled automated Dropbox file transfers in this post.
Other related tutorials
JSCAPE MFT Server also integrates with several other cloud-based storage solutions like Amazon S3, Azure Files, Google Storage, and others. Click the links below if you wish to know how to transfer files with those online solutions as well.
Amazon S3 vs Local Storage – Where Should You Store Files Uploaded to Your File Transfer Server?
How To Use Amazon S3 As The File Storage System of Your MFT Server
How To Connect and Upload Files To an Amazon S3 Trading Partner
How To Use Google Storage As The File Storage System Of Your MFT Server
How To Schedule Automated File Uploads From Your Server To Google Storage
Using Azure Files As The File Storage System Of Your MFT Server
How To Connect And Upload Files From Your Server To An Azure File Share
How To Schedule Automated File Uploads From Your Server To Box Cloud Storage
Watch the video
Would you prefer to watch a video version of this tutorial instead? You can play the video below. Otherwise, just skip it if you wish to continue reading.
How to do it
Before proceeding we will assume you already have a Dropbox account and have a Dropbox account access token on hand. You can find instructions for obtaining your Dropbox account access token here.
Once you have your Dropbox account access token on hand, you can start setting things up on JSCAPE MFT Server. Fire up your web browser and login to the JSCAPE MFT Server Manager.

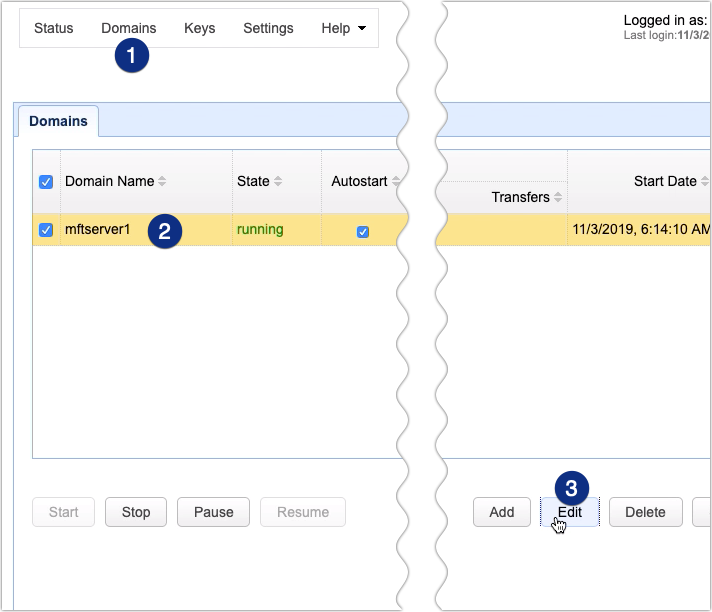
Go to Domains and select the domain that you want to perform the scheduled upload. After that, click the Edit button.
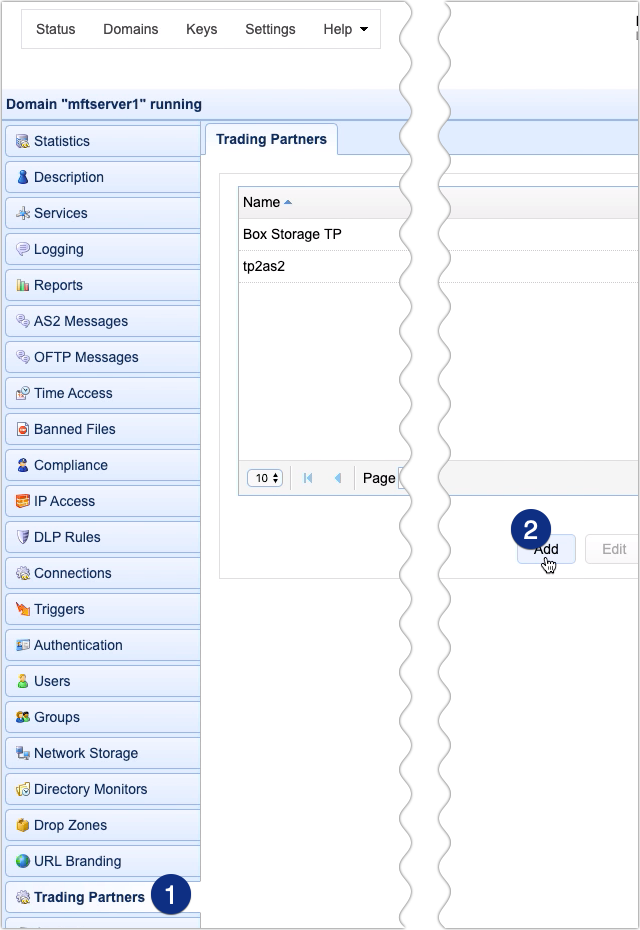
Go to the Trading Partners module and create a new trading partner object by clicking the Add button.
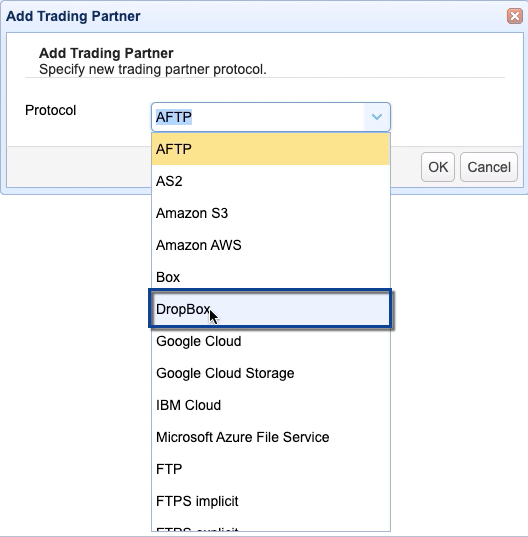
When the Add Trading Partner dialog appears, expand the Protocol drop-down list and select Dropbox. Next, click OK to proceed to the Dropbox trading partner parameters dialog.
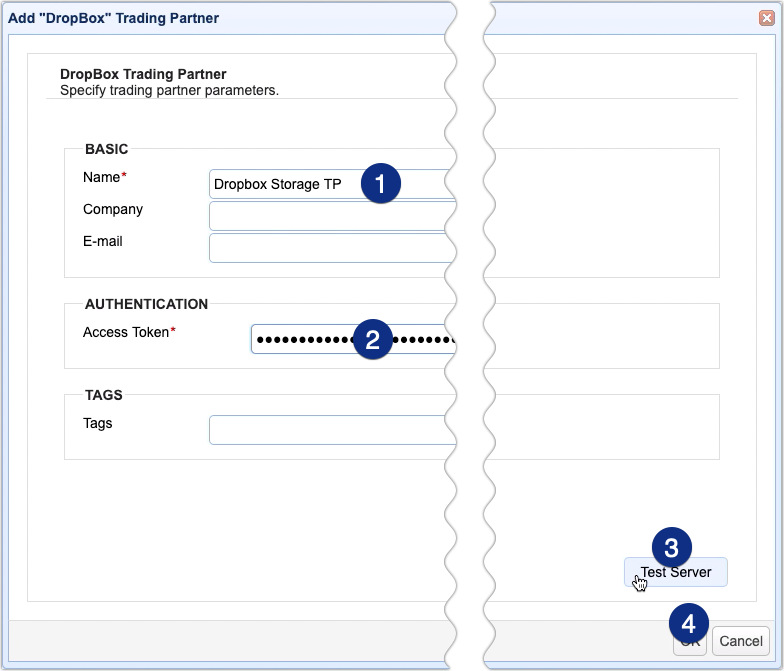
Once you’re inside the trading partner parameters dialog, give the trading partner a name, e.g. ‘Dropbox Storage TP’.
And then enter your Dropbox Access Token.
If you want, you can test the connection by clicking the Test Server button.
If the test succeeds, click OK.
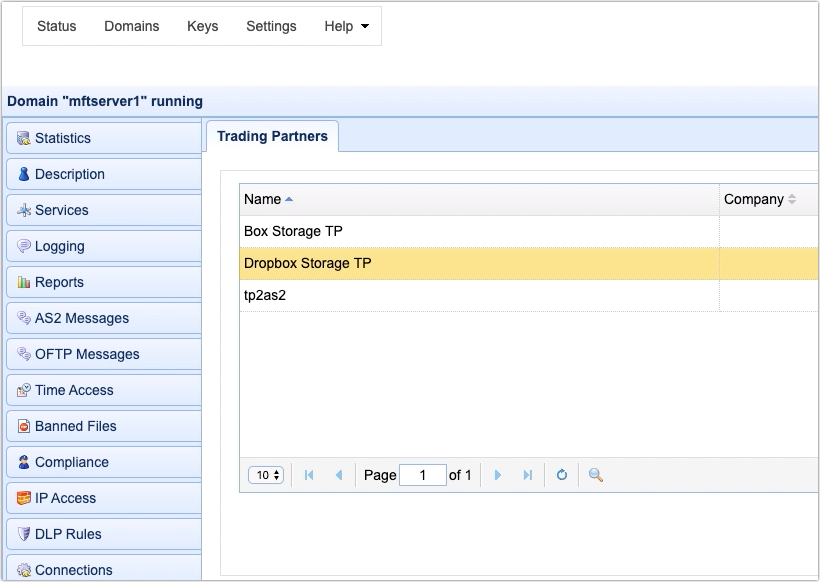
You should then see your newly created Dropbox trading partner among your list of trading partners.
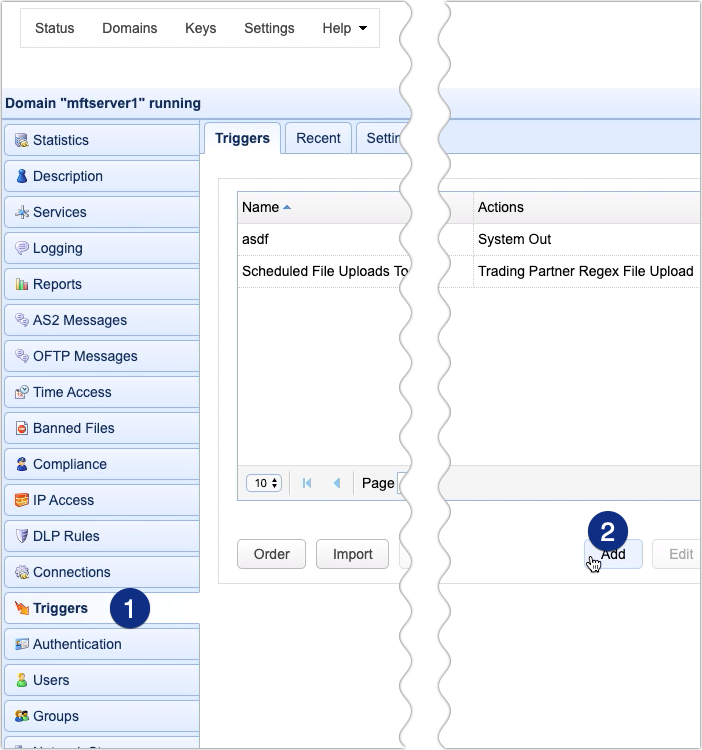
Now that you have your Dropbox trading partner, the next step is to create a trigger that would automatically upload files to this trading partner object at a predefined schedule.
To do that, go to the Triggers module and click the Add button.
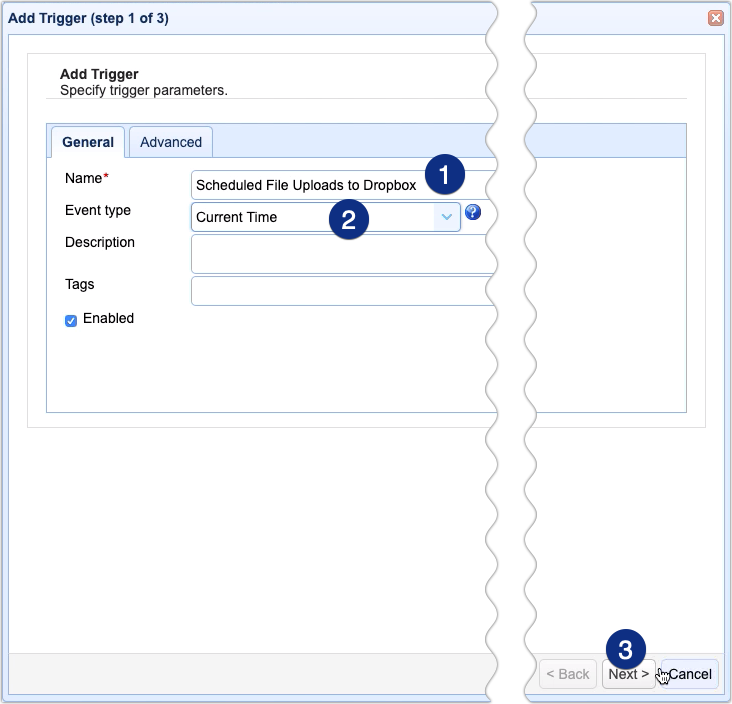
Give this trigger a name, e.g. ‘Scheduled File Uploads to Dropbox’
And then select Current Time as the Event Type.
Click Next to proceed.
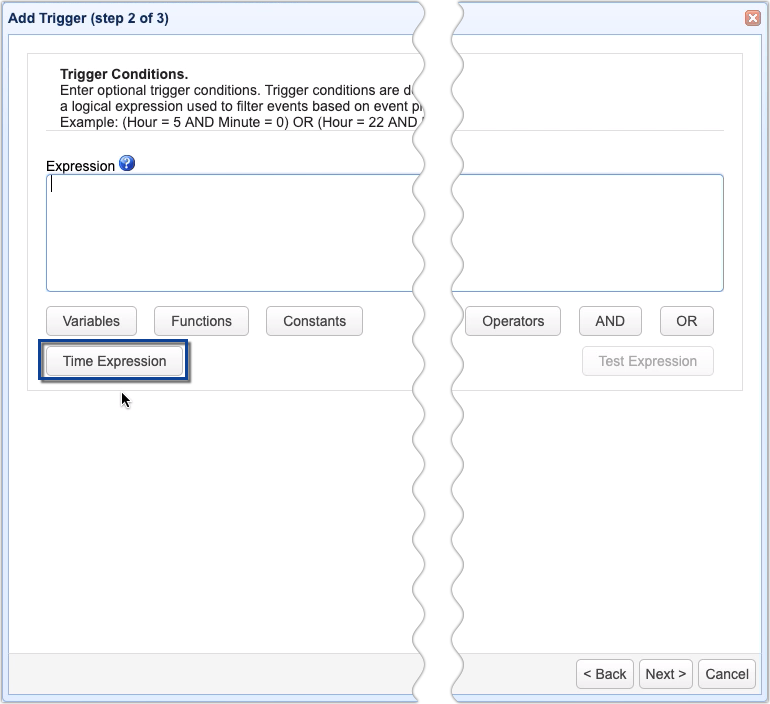
The next step is to create an expression that would specify when this upload trigger should fire, and the easiest way to do that is by using the Time Expression dialog. Click the Time Expression button.
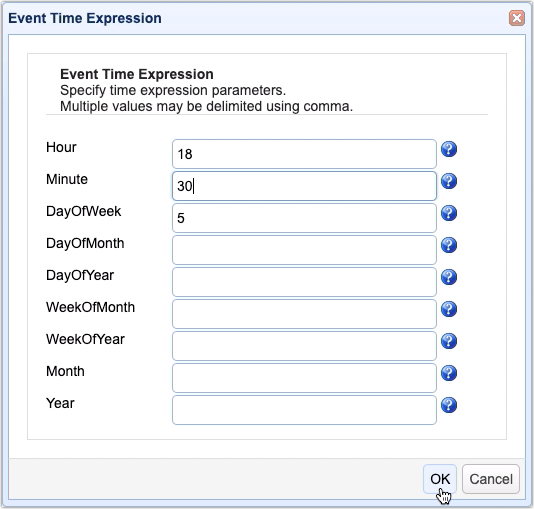
Once inside, specify the time expression parameters. In this example, we’d like this trigger to run every Friday at 6:30 PM. So, we enter:
Hour = 18,
Minute = 30, and
DayOfWeek = 5
Click OK to proceed.
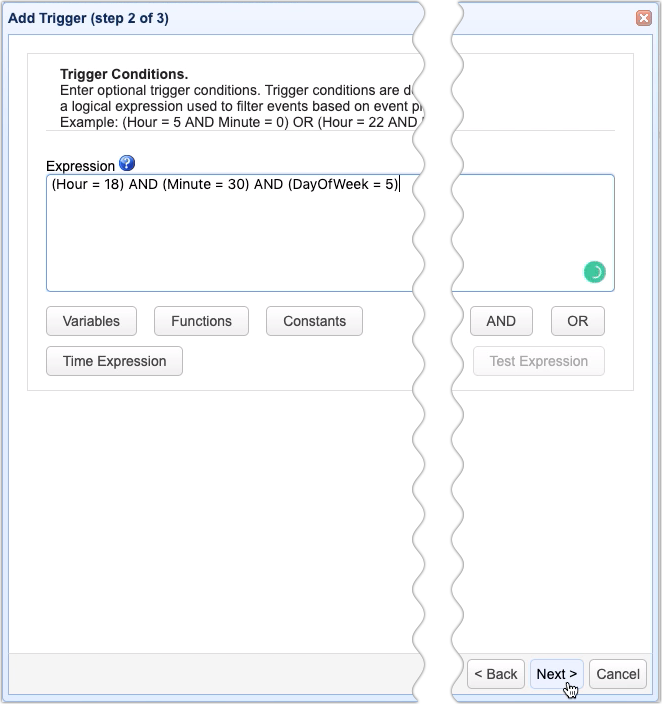
The appropriate time expression should then be written for you. Click Next.
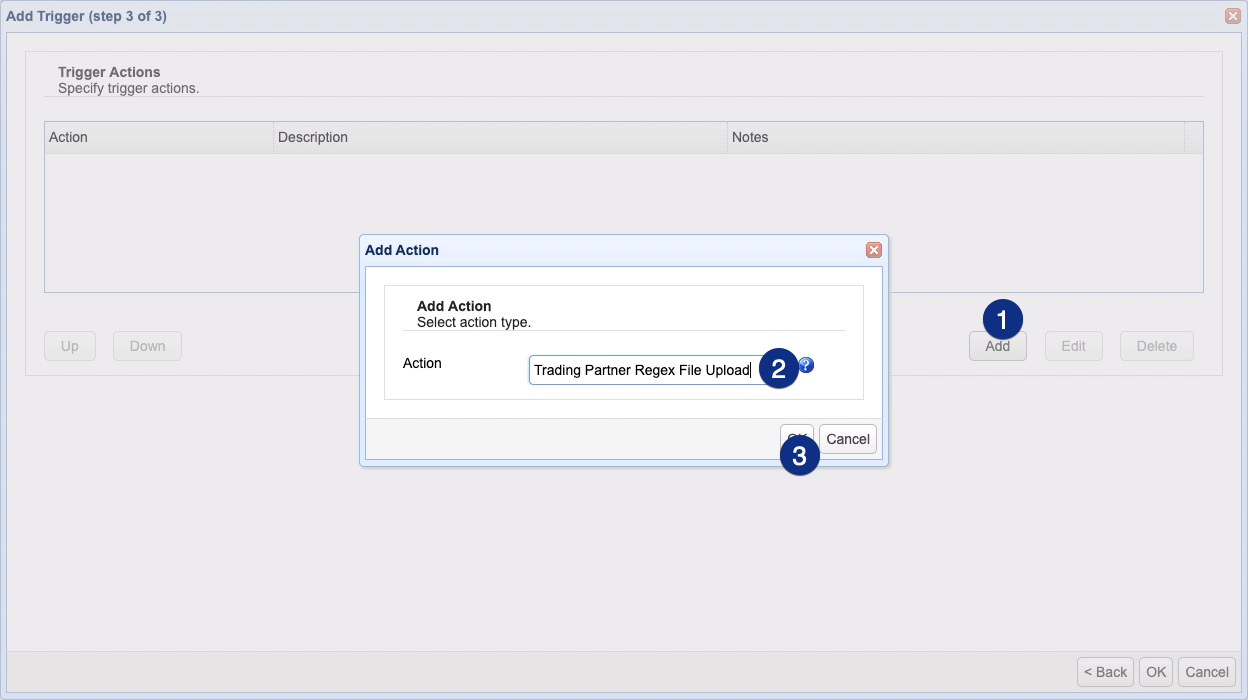
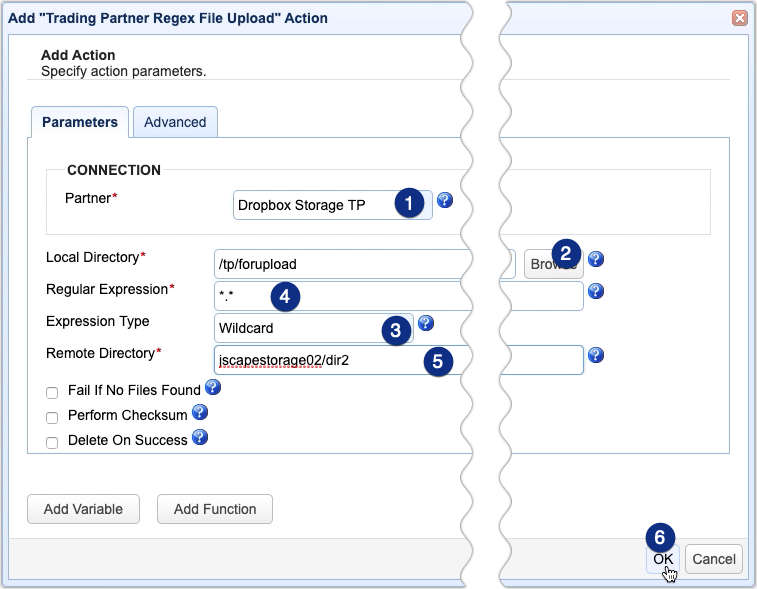
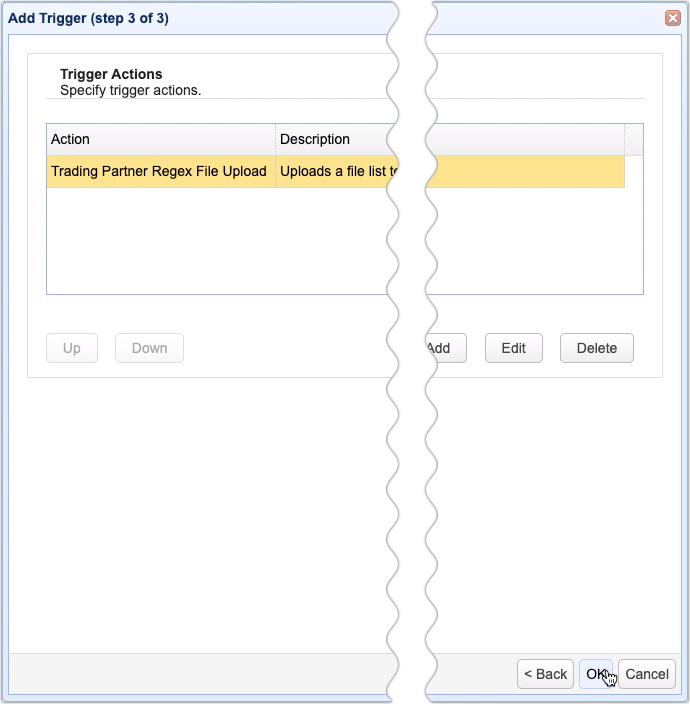
We’re now ready to add the trigger action that would be responsible for uploading files to our trading partner object. Because we want to upload multiple files, let’s use the Trading Partner Regex File Upload action. Expand the action drop-down list and select that particular trigger action and then click OK.
In the action parameters dialog, start by expanding the Partner drop-down list and selecting the trading partner you created earlier.
Next, go to the Local Directory field and browse to the local directory where you’re supposed to pick up the files you want to upload. So, in this example, those files are found in the ‘/tp/forupload’ directory.
Next, go to the Expression Type drop-down list and select between Regular Expression and Wildcard. Let’s just choose Wildcard for now.
After that, specify an expression. Because we’re using Wildcard and we’d like to upload all the files found in our Local Directory, let’s just type in *.*.
Finally, go to the Remote Directory field and enter the specific remote directory (if any) where you’d like to upload these files. In our case, we have a subfolder named dir2 under the folder jscapestorage02, so we enter jscapestorage02/dir2.
Click OK to finalize the trigger creation process.
Once you’re back at the main screen, you should then see your newly created trigger among your list of triggers.
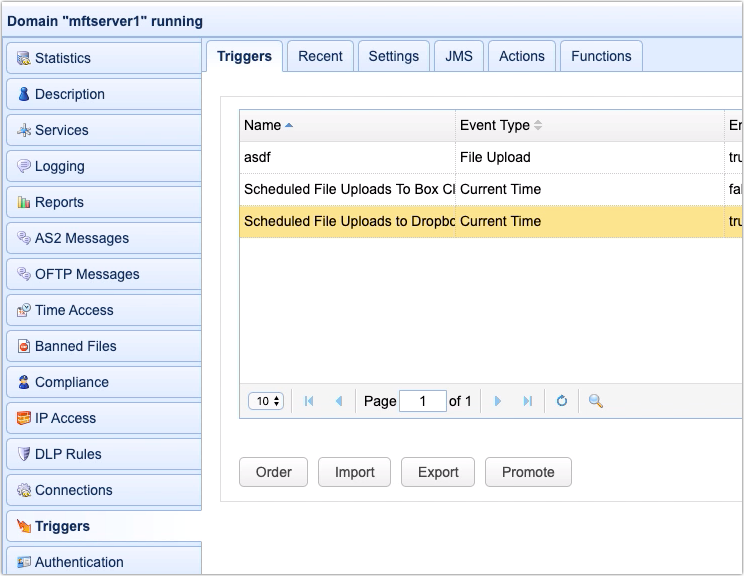 That’s it. Now you know how to configure JSCAPE MFT Server to send out scheduled automated file transfers to Dropbox.
Try this out
Would you like to try this out yourself? Download the FREE, fully-functional Starter Edition of JSCAPE MFT Server now.


