Overview
As explained in the first section of the article Preparing Trading Partner Servers For SFTP Automation, the process of establishing an automated file transfer can be greatly simplified by employing what is known as a trading partner. In this post, we’ll teach you how to set up a trading partner designed for automated FTP/S transmissions. What you’ll be able construct by the end of this tutorial can then be used for a variety of automated FTP/S-based transactions.

1. Add a new trading partner with an FTP/S connection
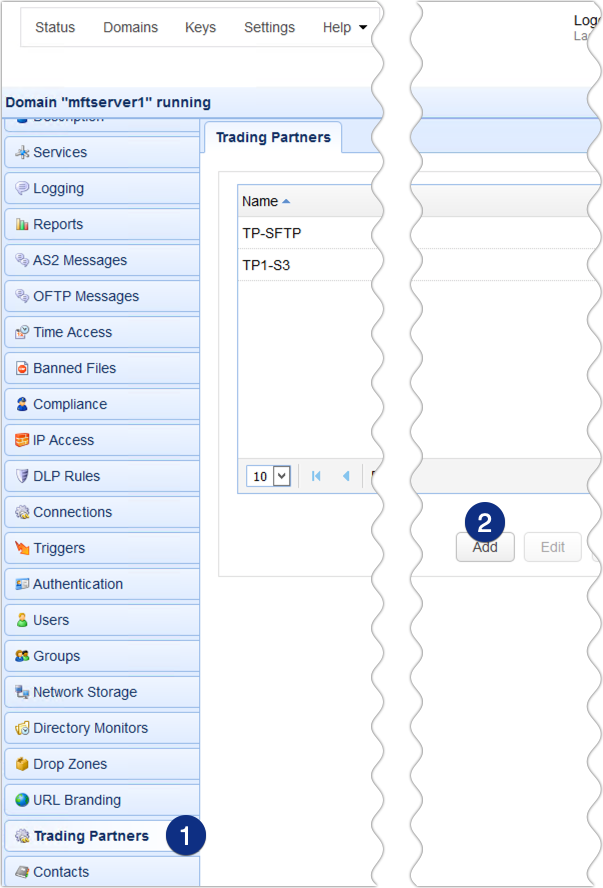
Navigate to the Trading Partners node and click the Add button.

2. Select the FTP protocol
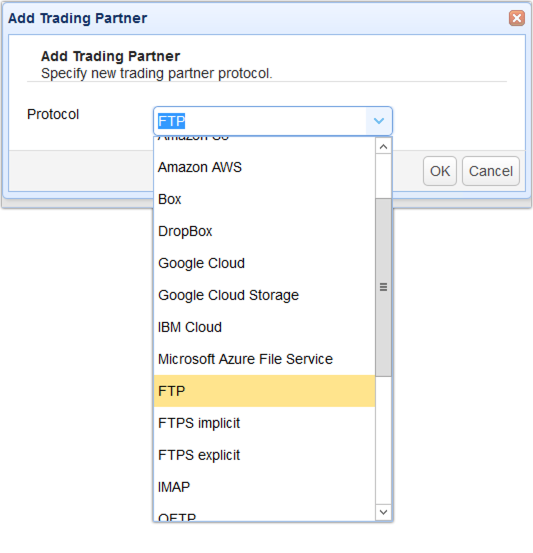
The next step would be to associate a file transfer protocol to this particular trading partner. As soon as the Add Trading Partner dialog pops up, expand the drop-down list and select FTP. Note that you also have the option to select FTPS implicit or FTPS explicit. It’s highly recommended that you use FTPS when transferring files in a production environment. Click OK when done.

3. Enter the required parameters for the FTP connection
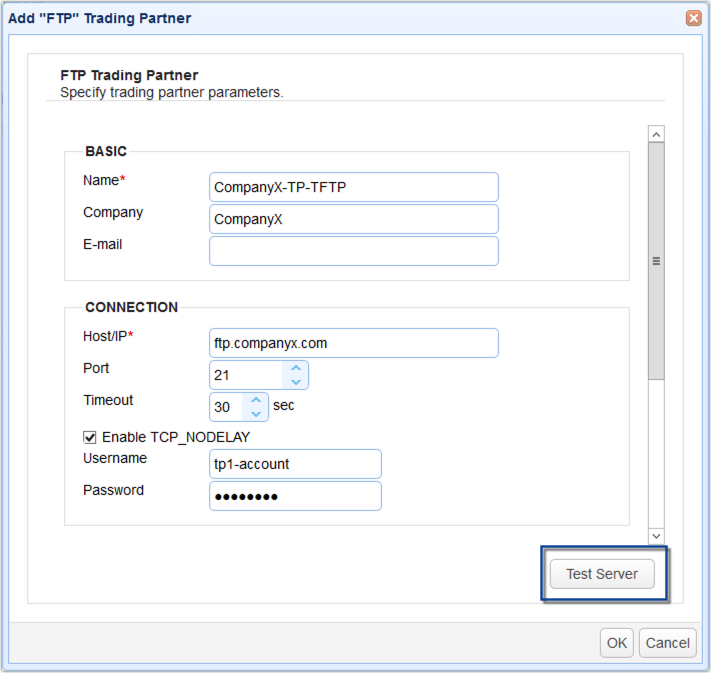
You’ll then be brought to a dialog box where you’re supposed to enter trading partner parameters. The set of parameters that will be presented to you will depend on the protocol you chose in the previous step. In other words, the parameters you see below, which is for FTP, will be different from the parameters you’d have seen had you selected say AS2.
Here are brief descriptions of the most essential parameters:
Name – The name you enter in the field provided will appear in places in the JSCAPE MFT Server environment where trading partners are supposed to come into play. Thus, we strongly advise you enter a name descriptive of this particular trading partner.
Company – This is just the name of the other party whose server you’ll be connecting to.
E-mail – Although optional, this field is supposed to contain the email address of the person you would normally contact regarding this particular connection.
Host/IP – This is the host or IP address of the other party’s FTP server.
Port – Since we’re using FTP for this automated file transfer, just enter 21.
Timeout – This is the number of seconds over which your server will attempt to connect to the other server before timing out.
Username – The username of the account you’ll be logged into as soon as you (or technically, your server) have gained access to the other server.
Password – The corresponding password of that username.
After entering all the necessary values, you may test the connection to see if it works. Just click the Test Server button to test. Once the test confirms a success, click the OK button.

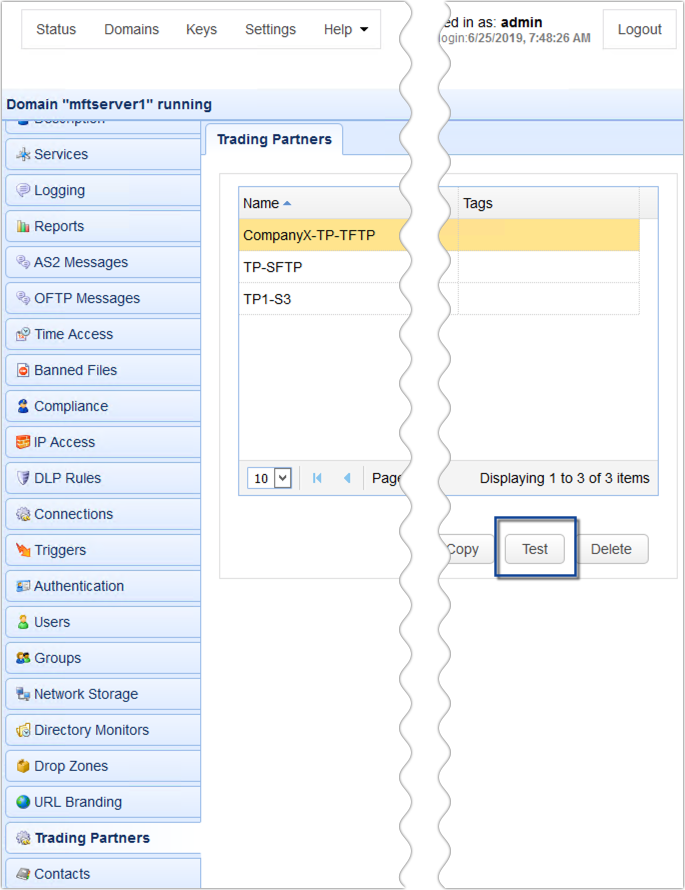
You will then be brought back to the main screen where you can see your newly created trading partner. Anytime you want to check this trading partner’s connectivity in the future, just navigate back to this screen, select the trading partner, and then click Test.

That’s it. You should now have a trading partner available for future automated FTP file transfers.
You might also want to check out these related posts
How To Set Up A Scheduled Automatic Download With A Trading Partner
Moving Files On The Remote Server After An Automated FTP Download
Generating A List Of Freshly Downloaded Files
Get Started
You can easily follow the steps on this tutorial by installing the free, fully-functional evaluation edition of JSCAPE MFT Server. Download it now by clicking the download button below.
Download JSCAPE MFT Server Trial
Other articles you might find interesting:
You Know It’s Time To Implement Server To Server File Transfer When..
Securing Trading Partner File Transfers w/ Auto PGP Encryption & FTPS


