How To Create A Client Certificate

In this post, we show you how to configure a client certificate and how to simplify certificate management.
Client certificates are the key elements of client certificate authentication, a validation method you can use to augment your HTTPS, FTPS, or AS2 server's username-password login method. A client certificate is a digital certificate that is essentially a file containing specific information (digital signature, expiration date, name of client, name of certificate authority) that helps make two-factor authentication possible.
Servers will often view certificates at the start of an SSL/TLS session for authentication. Before any sensitive data is transferred, this is done as part of the SSL/TLS handshake. Many web browsers, including Firefox, Chrome, Safari, and Internet Explorer, support client certificate authentication.
Getting Started
Would you prefer to watch a video version of this tutorial instead? You can play the video below. Otherwise, continue reading and start configuring.
This is actually just one of three closely related posts that can help you take advantage of this less-known security feature of SSL/TLS. The other two posts are:
What Is Client Certificate Authentication?
and
How To Import A Client Certificate To Firefox
Note: If you want to follow this tutorial, we encourage you to download a free 7-day trial of JSCAPE MFT Server.
Let's begin the tutorial.
1. Launch The Key Manager And Generate The Client Certificate
Go to Keys > Client Keys tab and then click the Generate button.
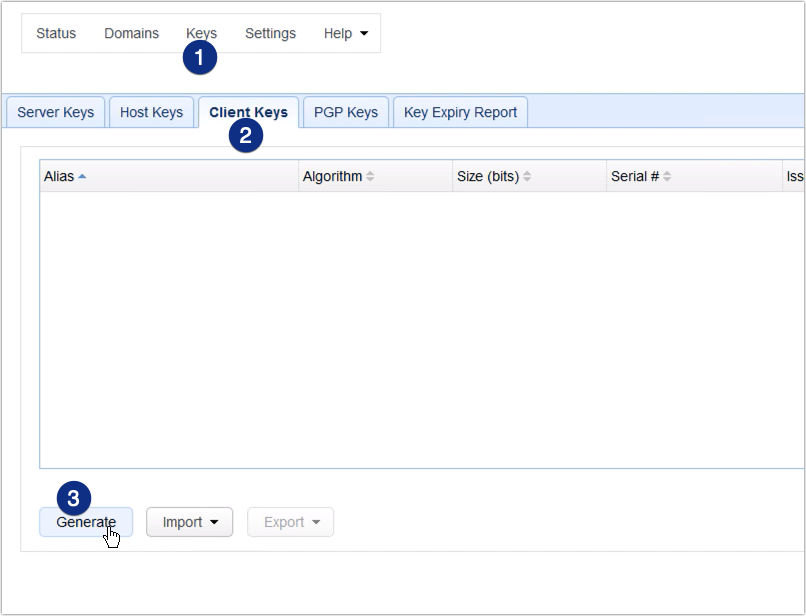
If you’ve tried setting up SFTP public key infrastructure/authentication on MFT Server before, this is exactly the same place where you create an SFTP key.
2. Enter Client Certificate Details
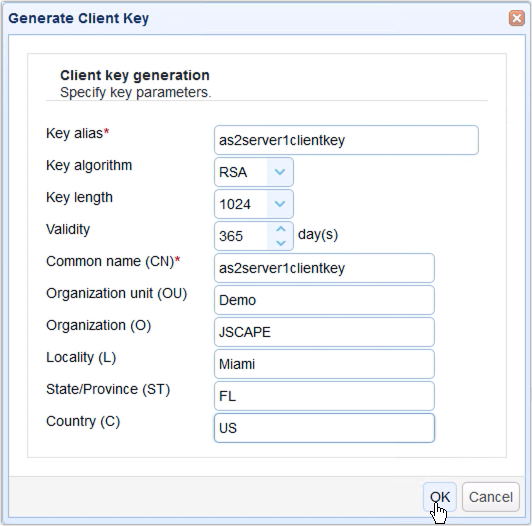
Fill up the fields in the Generate Client Key dialog. You'll need to enter the following information (note that we will be using the terms "certificate" and "key" interchangeably here):
Key alias - The key alias is just the name that will be used to refer to this particular key within the JSCAPE MFT Server Manager environment. An example is as2server1clientkey
Key algorithm - Choose between RSA or DSA. That link discusses the difference between these two key algorithms.
Key length - Choose between 1024, 2048, and 4096. Read the post "Choosing Key Lengths for Encrypted File Transfers" if you need more information on the subject.
Validity - Specify how many days you want your certificate to remain valid.
Common name (CN) - This is the name associated with this client-side certificate. If the client using this certificate will be manually operated by a person, then the usual practice is to enter that person’s email address. If it’s a machine, then use the hostname of that machine. Let’s use the key alias for this example.
Organization unit (OU) - Indicates the specific unit in your organization that will use this key, e.g. Accounting or IT.
Organization (O) - The name of the user's organization.
Locality (L) - The name of the user's city.
State/Province (ST) - The name of the user's state or province.
Country (C) - The user's two-character country code, e.g. "US".
3. Export The Client Certificate
After you click OK, you'll be prompted to export the client certificate's private key file. Enter a filename for that file. Enter a password as well to protect it. Lastly, specify a format. We recommend PKCS12. Click OK to proceed.
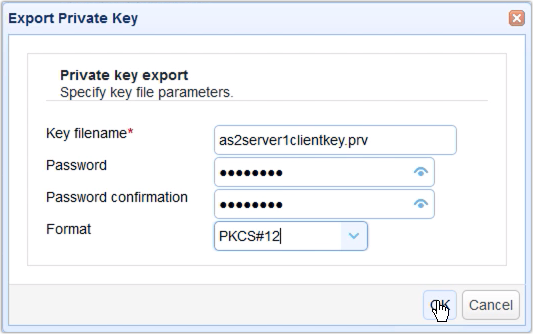
Save the file when prompted.
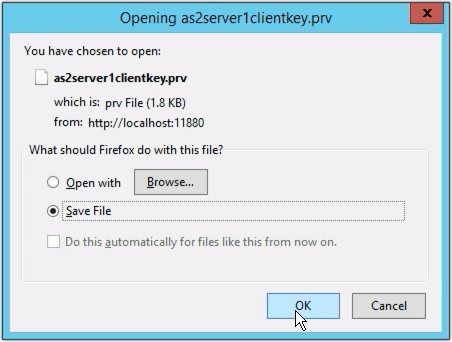
You can then save the file when prompted. Make sure you save that file in a safe place.
4. Check Out Your Newly Created Client Certificate
Your newly created client certificate should then be added to your Client Keys under the Certificates node. Verify that everything is working correctly.
Ready to see client certificate authentication in action and explore more advanced security features? Book a demo now and discover how JSCAPE MFT Server can elevate your secure file transfer processes.
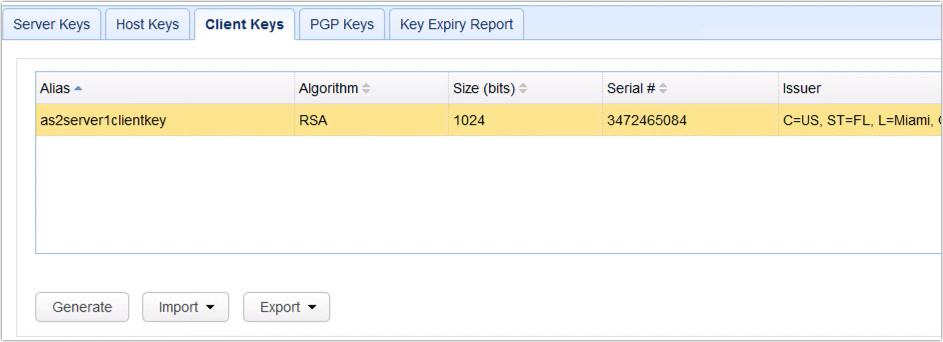
Now that you have your newly created client certificate, you can then load the pfx private key file you recently exported onto a user's client application. In most cases, when using the JSCAPE MFT Server, you would simply load that file to your trading partner module. You could then export this certificate’s corresponding public key and load that key to a trading partner’s remote service.
The trading partner module of your JSCAPE MFT Server instance usually acts as a client to a trading partner’s remote service. With the private key in your trading partner module and its corresponding public key in your trading partner’s remote service, you can then commence with client certificate authentication. The remote service can authenticate your host by checking if the two keys match.
If you’re still having a hard time grasping the concept, don’t worry. In our next post, we'll show you how to use your newly created client certificate by enabling client certificate authentication on JSCAPE MFT Server's AS2 service.
Get Your Free Trial
Would you like to try this yourself? JSCAPE MFT Server is platform-agnostic and can be installed on Microsoft Windows, Linux, Mac OS X and Solaris, and can handle any file transfer protocol as well as multiple protocols from a single server. Additionally, JSCAPE enables you to handle any file type, including batch files and XML. Download your free 7-day trial of JSCAPE MFT Server now.
