How To Get Your MFT Server Email Each User A List of Old Files

Overview
Some time in the past, we showed our readers how to set up a managed file transfer server so that it could email certain people a list of all old files. That email was meant to be sent only to a select number of individuals, presumably the server admins. But what if you wanted to email each user their own individual lists? This blog post will teach you how.
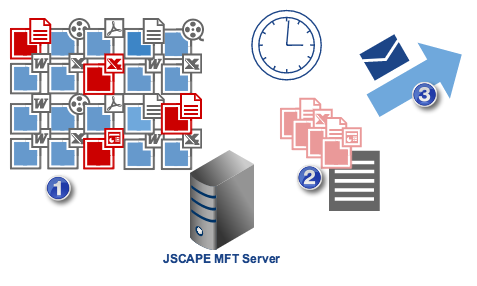
What you'll need
To clarify, if what you want is an automated email containing an aggregate list of old files of all user accounts on your MFT Server, then you should read the blog post How To Get Your MFT Server Email You A List Of Old Files. But if you want to email each user their own individual list of old files, read on.
Here's what you'll need.
- A Directory Monitor for detecting aged files. This Directory Monitor should be aimed at the parent directory of all user directories and it should be set to "Monitor recursively". Recursive monitoring will allow the server to detect aged files in all user directories beneath that parent directory, even if those files are located in underlying subdirectories.
- A Trigger for activating that directory monitor. While directory monitors can run every second, minute, or hour, you normally wouldn't want it to do that in this case. Most likely, you'll want this monitor to run on only a certain hour of day or perhaps even on a certain day of the week or month. For cases like this, a trigger-activated directory monitor would be more suitable.
- A Trigger for generating a list of old files for each user, storing the list in a file named oldfiles.txt, and then saving it in the user's root directory. Note that each user will have his/her own list, so each user will have his/her own distinct oldfiles.txt.
- A Directory Monitor for detecting the presence of oldfiles.txt. Before each oldfiles.txt can be emailed to their respective owners, the server will need a way of knowing they've already been generated and ready to be sent out. This directory monitor will help the server achieve that.
- A Trigger for emailing each list of old files to their respective owners. Lastly, you'll need a trigger that will send out an email (with the oldfiles.txt as an attachment) to each user. This trigger will draw the destination email address from each user account's information stored on file.
Now that we've laid out the game plan, it's time to execute it.
Setting up a Directory Monitor to detect aged files
The first step would be to set up the directory monitor meant for detecting the aged files. Go to the Directory Monitors module and click the Add button.
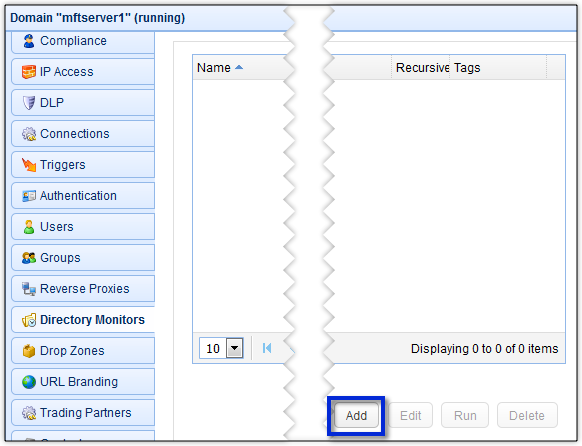
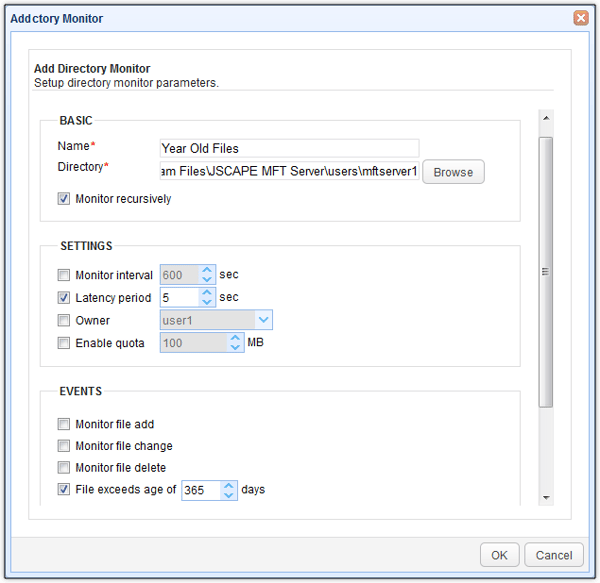
That should bring up the Add Directory Monitor dialog (see screenshot below).
Give the monitor a Name. In this example, we'll be monitoring the directory for files that are already over a year old, so let's just call this monitor "Year Old Files".
Proceed to the Directory field and Browse to the parent directory that holds all user directories on your server.
Tick the checkbox labeled "Monitor recursively". By doing so, you are telling the server to monitor all underlying subdirectories of the directory you selected earlier in the Directory field. That means, it would also monitor all user directories as well as all subdirectories underneath them. If you have multiple layers of subdirectories under each user directory, then the server will monitor those directories as well.
In most cases, directory monitors check monitored directories every x number of seconds. This value (x) is taken from the Monitor interval setting, whose default is 600 seconds. If you want the directory monitor to check every minute, then you would set that value to 60 seconds. If you want it to check every hour, then that value should be 3600 seconds, and so on.
In this particular case, however, we don't need our monitor to check as frequently. We find it sufficient for the monitor to check maybe once a day or perhaps even once per week or per month. For longer intervals like daily, weekly, or monthly checks, it would be better to disable the Monitor interval setting and then use a time-based trigger to activate the directory monitor instead. That's why we've un-checked the Monitor interval setting in the screenshot below.
In the Events panel, un-check all checkboxes except the one labeled File exceeds age of. For that setting, enter 365 days (which is approximately equivalent to one year).
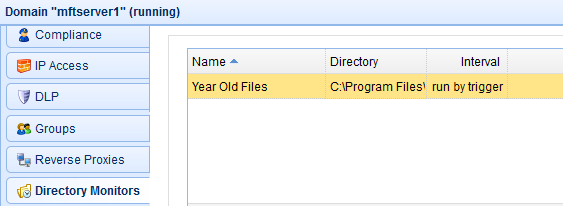
As soon as you're done here, click the OK button. In fact, click all OK buttons until you're back at the main screen. You should see your newly created directory monitor in the Directory Monitors main screen.
Let's now buid the time-based trigger that will activate the directory monitor we just set up.
Building a trigger to activate the directory monitor
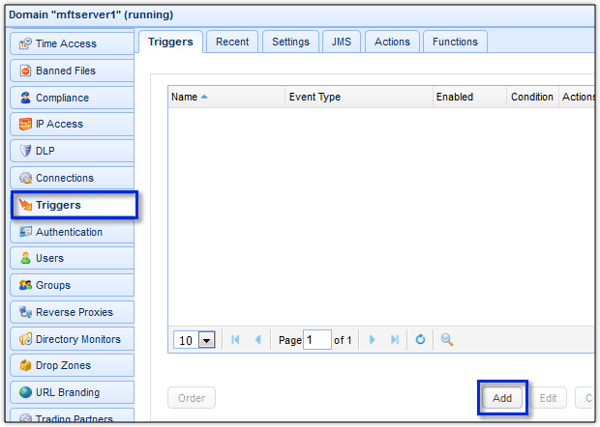
Go to the Triggers module and click the Add button.
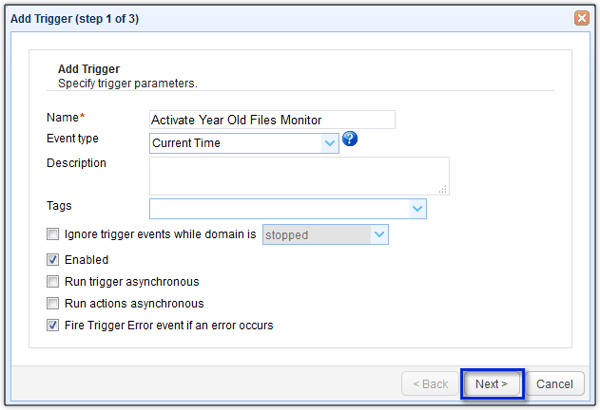
Give the trigger a Name. Let's just call it "Activate Year Old Files Monitor" for now. You may call yours whatever you want later on.
Next, choose the Current Time event type and make sure the Enabled checkbox is checked.
Click Next to proceed.
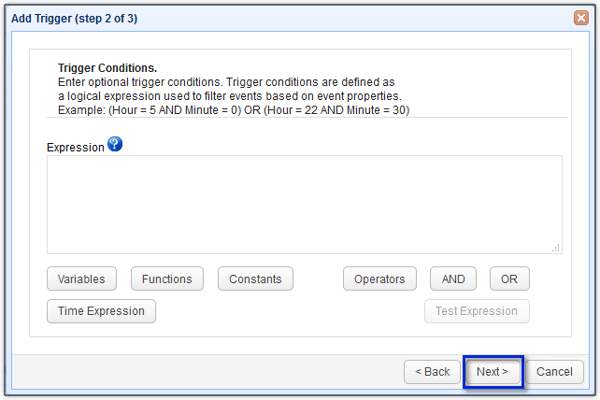
Now, you will have to specify an expression that will schedule when this trigger should perform its trigger actions. Since we have already talked about time-based triggers quite extensively in the article Benefits of a Scheduled File Transfer and How To Set One Up, you can use that article as reference.
Once you've entered your time expression, click the Next button to proceed.
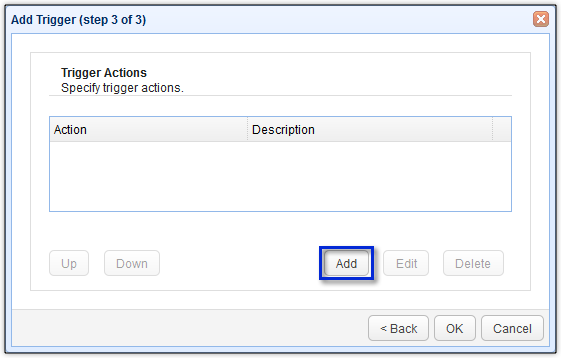
We're now ready to add the trigger action that would activate the directory monitor.
In the Add Trigger dialog window, click the Add button.
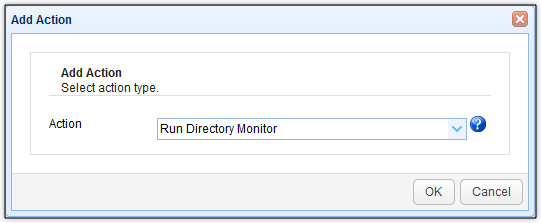
Select Run Directory Monitor from the drop-down list and then click OK.
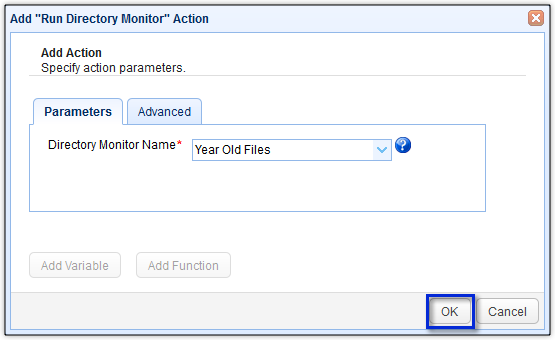
Select the directory monitor we created earlier from the succeeding drop-down list and then click OK.
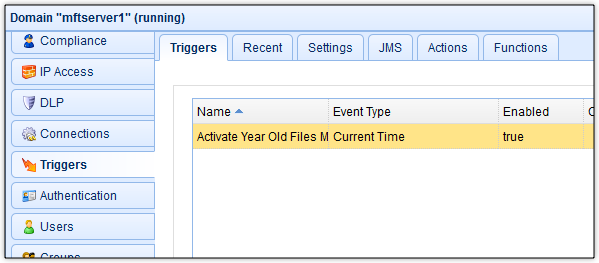
We've now created the trigger that would activate our directory monitor on whatever schedule you specified.
Creating a trigger to generate the list of old files
Once the Year Old Files directory monitor starts running, it will seek out files that are over a year old. Each time a year-old file (or older) is found, the monitor will fire the Directory Monitor File Aged event.
We'll now create a trigger that will respond to each of these events and subsequently write the path of the aged file found unto a file named "oldfiles.txt".
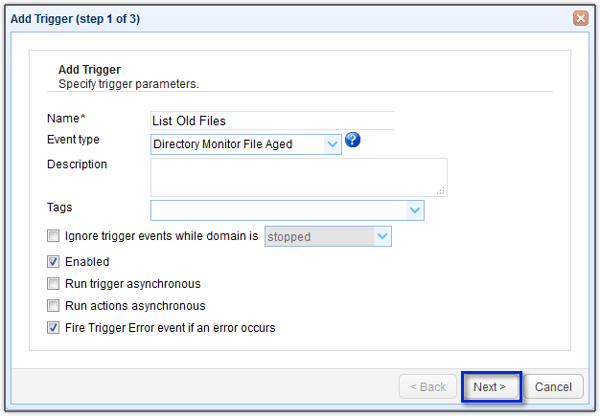
Again, give this trigger a name. We'll be using "List Old Files" for this example.
Select the Directory Monitor File Aged event and then click Next.
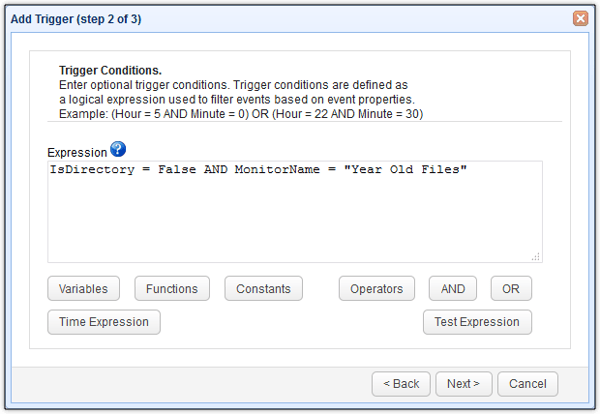
Because the directory monitor will also detect subdirectories that are over a year old, we'll need to tell the server to skip those. We do that by adding the IsDirectory = False expression.
Also, since you might have more than one directory monitor that's firing the Directory Monitor File Aged event, you'll want to tell this trigger to respond only to the "Year Old Files" directory monitor. To do that, just add the expression MonitorName = "Year Old Files".
The complete expression would be:
IsDirectory = False AND MonitorName = "Year Old Files"
You may add more trigger conditions. To see what variables, functions, constants, etc., are supported, just click their respective buttons found below the Expression box.
Click Next to proceed.
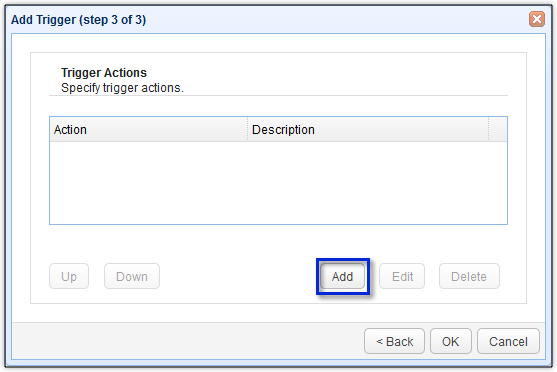
Add the trigger action.
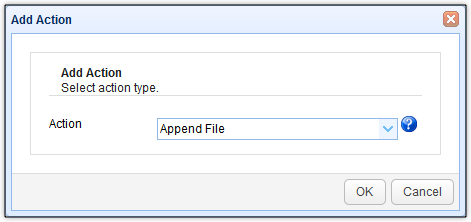
Select the Append File trigger action. This action will append text to a file.
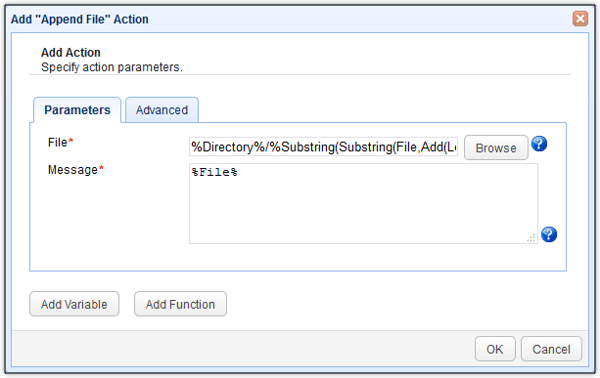
The Append File action has two main parameters:
1. File, the path of the file to be appended to. In our case, that would be the path of each user's oldfiles.txt.
and
2. Message, whatever message you want to append to File.
Because the path of each user's oldfiles.txt must vary depending on the user, we can't use a single path. Here's the expression we suggest you enter into the File field:
%Directory%/%Substring(Substring(File,Add(Length(Directory),1)),0,IndexOf(Substring(File,Add(Length(Directory),1)),GetPathSeparator()))%/oldfiles.txt
This combination of variables and functions will result in an oldfiles.txt path that would largely depend on the value of the File variable. So what is the value of File variable?
The value of the File variable is simply the path of whatever aged file was found by the "Year Old Files" monitor, causing it to fire the Directory Monitor File Aged event, which this trigger then responded to. Because, as we said earlier, each aged file found would fire a Directory Monitor File Aged event, the value of the File variable would therefore change accordingly.
So, for example, if the value of the File variable is:
C:\Program Files\JSCAPE MFT Server\users\mftserver1\johndoe\subfolder1\subfolder2\ancientfile.txt
where ancientfile.txt is over a year old, then
the return value of the expression would be:
C:\Program Files\JSCAPE MFT Server\users\mftserver1\johndoe\oldfiles.txt
or if the value of the File variable is:
C:\Program Files\JSCAPE MFT Server\users\mftserver1\peterpan\subfolder1\prehistoric.txt
then the return value of the expression would be:
C:\Program Files\JSCAPE MFT Server\users\mftserver1\peterpan\oldfiles.txt
Note that the expression above will only be able to serve its purpose if
- All your users' directories are found under the monitored directory, which is represented by the variable Directory, and
- The names of all your users' directories are simply your users' usernames. This is the default setting on JSCAPE MFT Server, so unless you changed that, you're good to go.
Going through each variable and function in the expression would make our post much longer than it already is, so we'll probably just talk about them in more detail in a future post. For now, it's sufficient to know that the expression will create an oldfiles.txt under each user's home directory.
Each user's list should contain the paths of each aged file found in that user's subdirectories. Because the File variable already contains those paths, all we need to enter into the Message is the File variable. Each time this trigger responds to a Directory Monitor File Aged event, a new path (represented by the the value of the File variable at that instant) will be appended.
Click all OK buttons until you're back at the main screen.
Now that we have the trigger for generating our lists, we need to create a trigger that would email those lists out. But before we can do that, our MFT Server must first know that the list has already been generated.
Setting up a directory monitor to detect new lists of old files
We start by setting up a directory monitor that would monitor each user's home directory. Because it would be too tedious to create one directory monitor for every single user's home directory, we can simply monitor those directories' parent directory and then set the monitor to monitor recursively.
But wouldn't this monitor then be pointing to the same directory as the first directory monitor? You're right. However, while the first monitor is going to be activated by a time-based trigger, this one will be checking the directory every x number of seconds.
Also, this directory monitor will be checking for a newly added file instead of an aged file. Each time a newly added file is found, this directory monitor will fire a Directory Monitor File Added event.
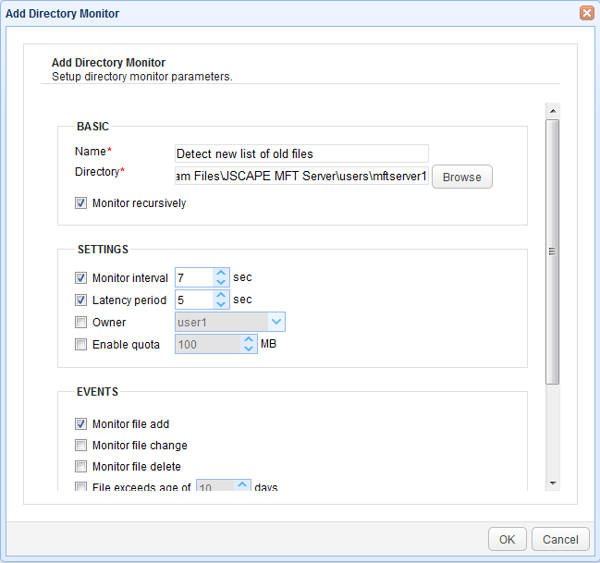
We now move on to our last trigger. Let's create that trigger now.
Creating a trigger to email each user a list of old files
This trigger will be tasked to do the following:
- Listen to any Directory Monitor File Added event;
- Respond to the event if the newly added file is named "oldfiles.txt";
- Send out an email to the user who owns the folder where the oldfiles.txt was added; and
- Delete the oldfiles.txt after emailing it in order to give way to a fresh list.
Step 1 can be achieved by simply selecting the Directory Monitor File Added event type.
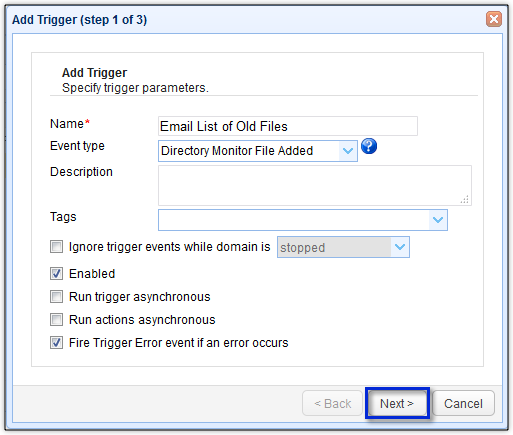
To meet the second requirement, just enter the following expression:
Name = "oldfiles.txt"
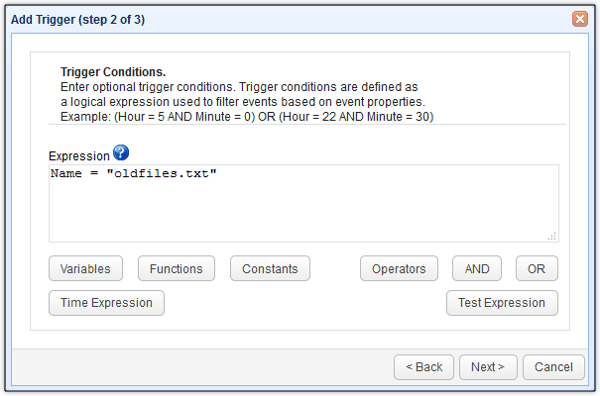
This will allow the trigger to disregard any newly added file that isn't named "oldfiles.txt"
You may also want to specify the directory monitor to further limit this trigger's response to Directory Monitor File Added events coming from the second directory monitor we created, like so:
Name = "oldfiles.txt" AND MonitorName = "detect new list of old files"
Once you're done, click the OK button to proceed and then add a new trigger action.
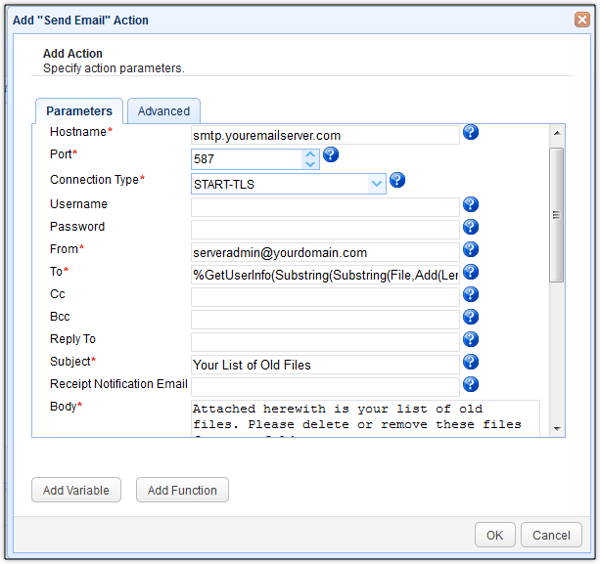
Select the Send Email action.
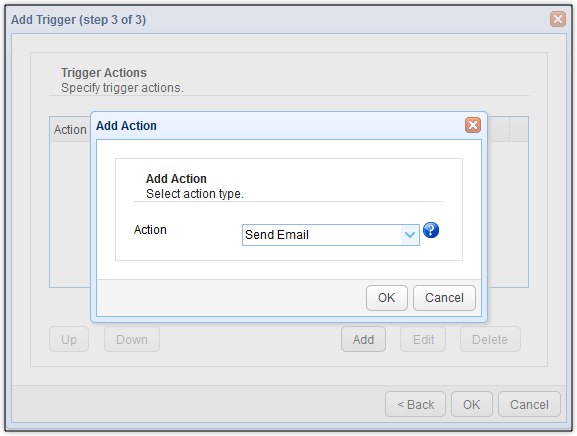
Now, you can't simply enter an email address into the To field. That's because each oldfiles.txt should be sent to the email address of its owner, i.e., the owner of the directory where the oldfiles.txt was added.
Here's the expression we recommend you enter into the To field:
%GetUserInfo(Substring(Substring(File,Add(Length(Directory),1)),0,IndexOf(Substring(File,Add(Length(Directory),1)),GetPathSeparator())),"EmailAddress")%
Again we won't go into the details but this expression is supposed to extract the username from the path represented by the value of the File variable. Unlike the previous value of File we talked about earlier, which represented the path of an aged file, the value of File this time is the path of each oldfiles.txt.
Here's a sample value of File:
C:\Program Files\JSCAPE MFT Server\users\mftserver1\johndoe\oldfiles.txt
What we'd like to extract from that path is johndoe.
Once we've extracted johndoe, we can then enter it into the first argument of the function GetUserInfo(). This function accepts two arguments, a username and some user information you want the function to return. So, for example, if you want to return the email address (which is what we need for the To field) of johndoe, then the GetUserInfo() must be entered as:
GetUserInfo("johndoe","Email Address")
Of course, since our username would vary depending on the path of oldfiles.txt, we would need the expression above.
Next, we would need to attach each oldfiles.txt to the email. As you probably have figured out by now, all that's needed would be the File variable.
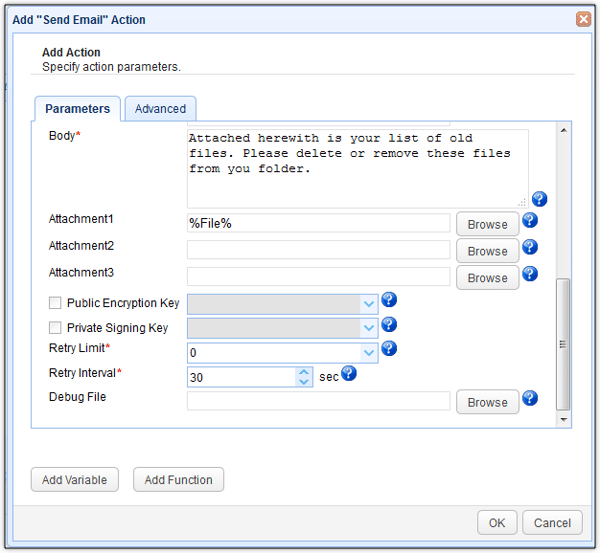
After clicking OK, stop at the list of trigger actions. You still need to add one more trigger action. We'd like to delete the oldfiles.txt that we just sent out in order to clear the way for a new list. Otherwise, the new list will simply be appended to the old list and then both will be sent out in the next batch of emails.
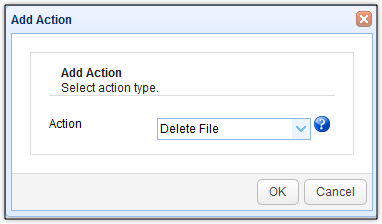
The Delete File trigger action should do the trick.
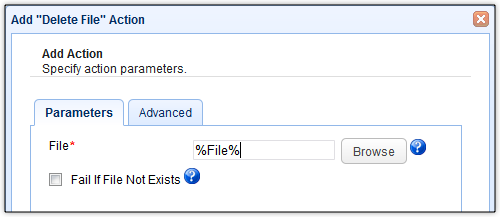
Again, just enter the File variable into the File field.
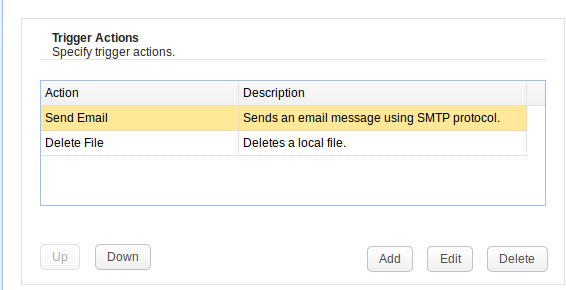
After clicking OK, you should now see the two trigger actions on your list of trigger actions for this trigger. Make sure the Delete File action is below the Send Email action.
Click OK until you're back to the main screen.
That's it!
Would you like to see this in action?
Get Started
Download a free, fully-functional evaluation edition of JSCAPE MFT Server now and follow the instructions on this tutorial.
Download JSCAPE MFT Monitor