How To Use Box As Cloud Storage For Your MFT Server

A file transfer server that stores user files in cloud storage solutions has many advantages. This would mean, your storage would be more scalable, highly available, cost-efficient, and secure. JSCAPE MFT Server easily integrates with several cloud storage solutions like AWS S3, Azure Files, Google Storage, Box, DropBox, and IBM Cloud, so that when users transfer files to it via FTPS, SFTP, AS2, HTTPS, and so on, those files will be stored directly into one of these cloud storage solutions.
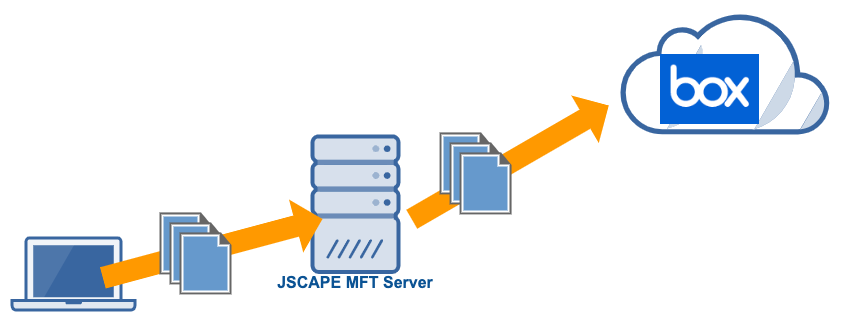
In this post, we'll teach you how to configure JSCAPE MFT Server, so it will store user files to Box. I'm going to assume you already have a Box Service Account and have generated a JSON file that contains your Box service account private key . You will need this file to authenticate with Box.
Watch the video
Would you prefer to watch a video version of this tutorial instead? You can play the video below. Otherwise, just skip it if you wish to continue reading.
Let me walk you through the steps now. Login to your JSCAPE MFT Server Manager.
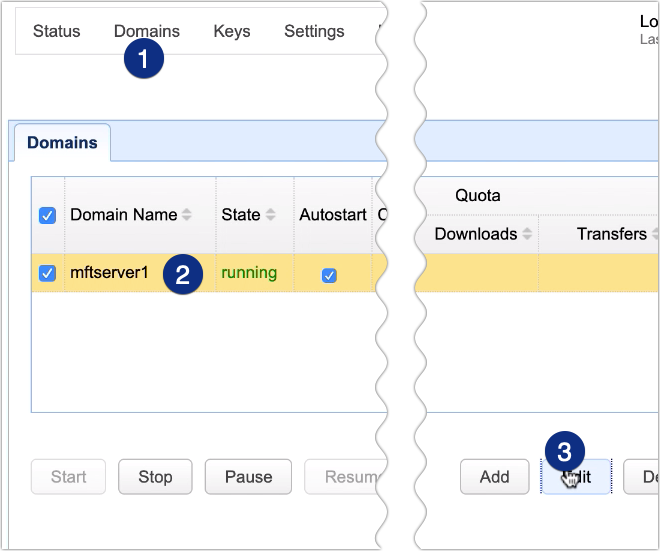
Go to Domains, select a domain, and click Edit.
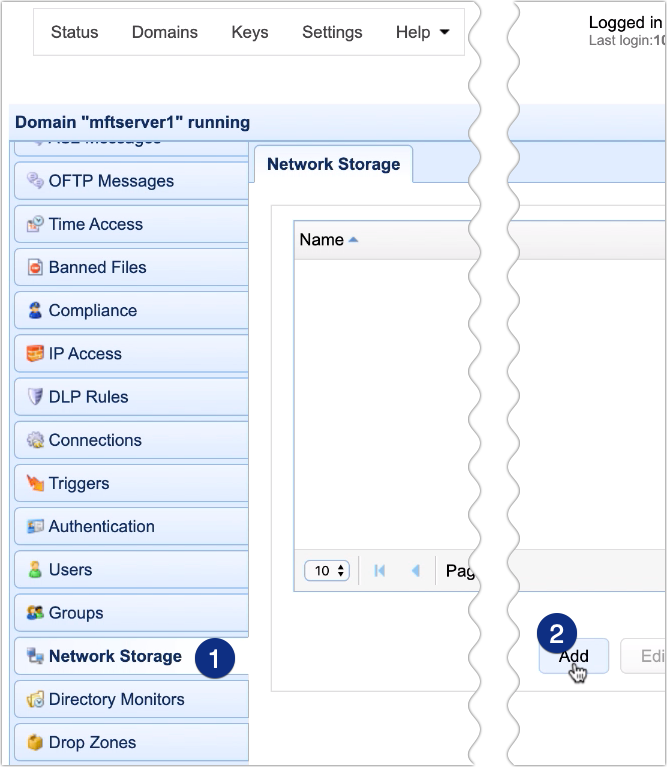
Next, navigate to the Network Storage module and click Add.
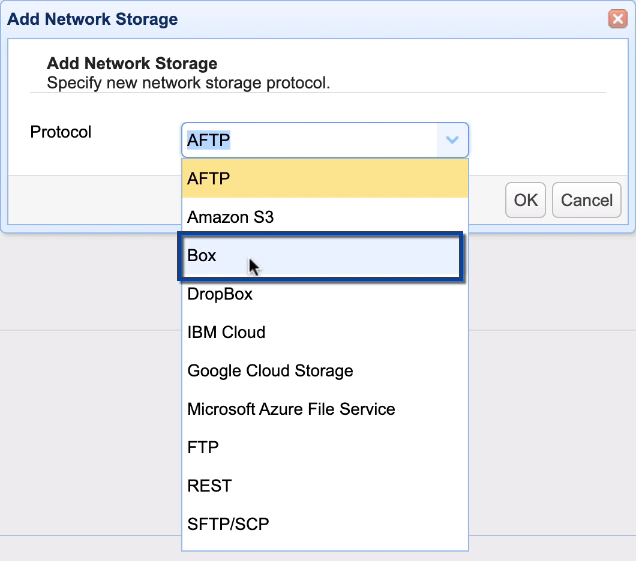
Select Box from the Protocol drop-down list and then click OK.
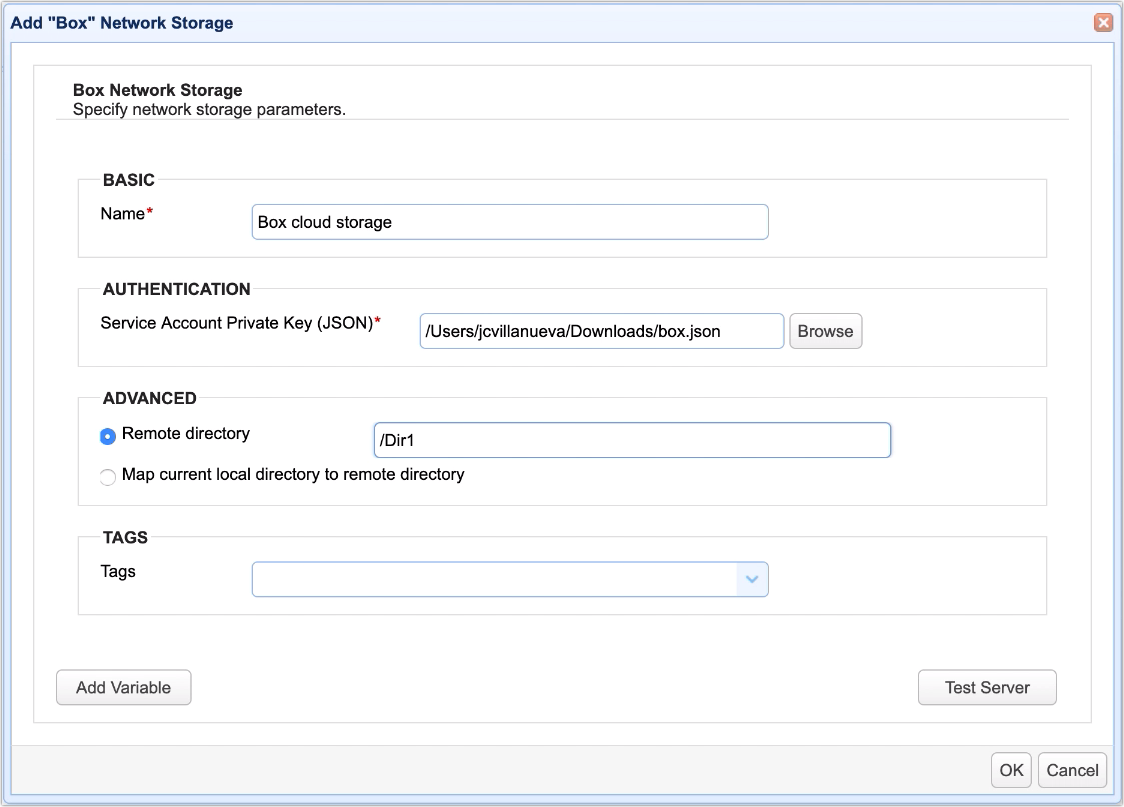
Give this network storage a name, e.g. 'Box cloud storage'.
After that, go to the Authentication section, click the Browse button and select the JSON file containing your Box Service Account private key.
Select the Remote directory option under Advanced and enter the path to the remote directory (if any) in your Box account where you want user files to be stored. In our case, we have a subdirectory named Dir1, and that's where we want our files stored, so we enter that.
You may test the connection by clicking the Test Server button.
If the test succeeds, proceed by clicking the OK button.
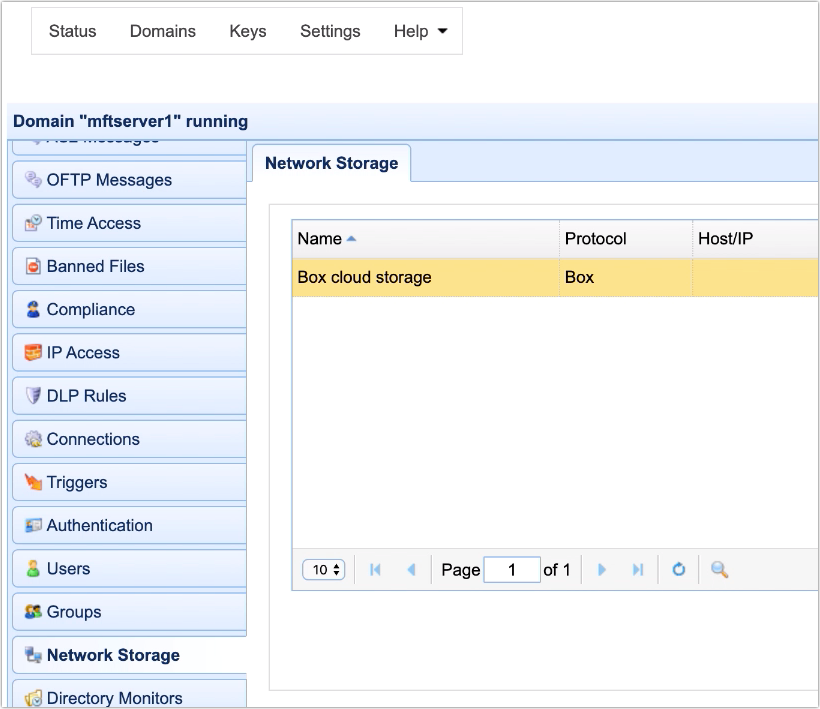
You should then see your newly created Box network storage object in your Network Storage list.
Now that you have your Box network storage ready, the next step is to define a virtual path to which a user or users will upload files to. There are two places where you can define that virtual path. You can do it in a user account or in a group. Let's just do it in a user account for now.
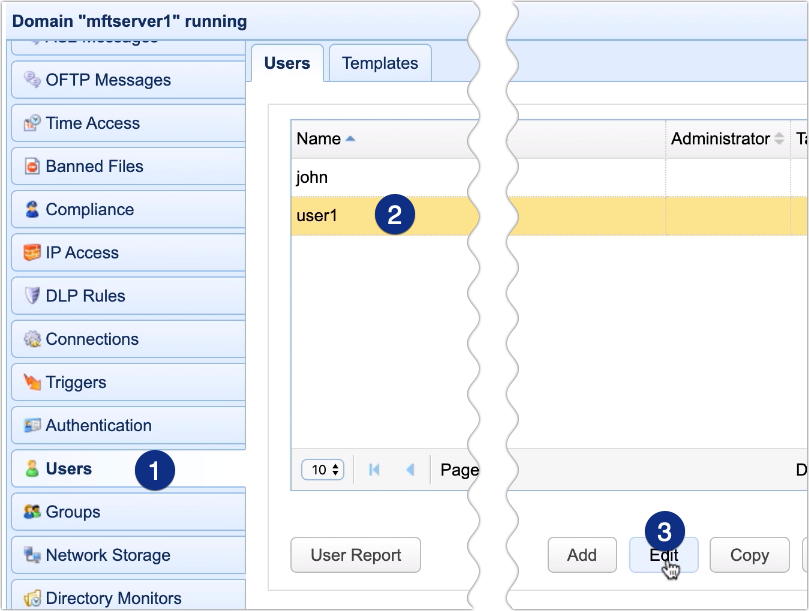
Go to the Users module and select a user. Next, click the Edit button.
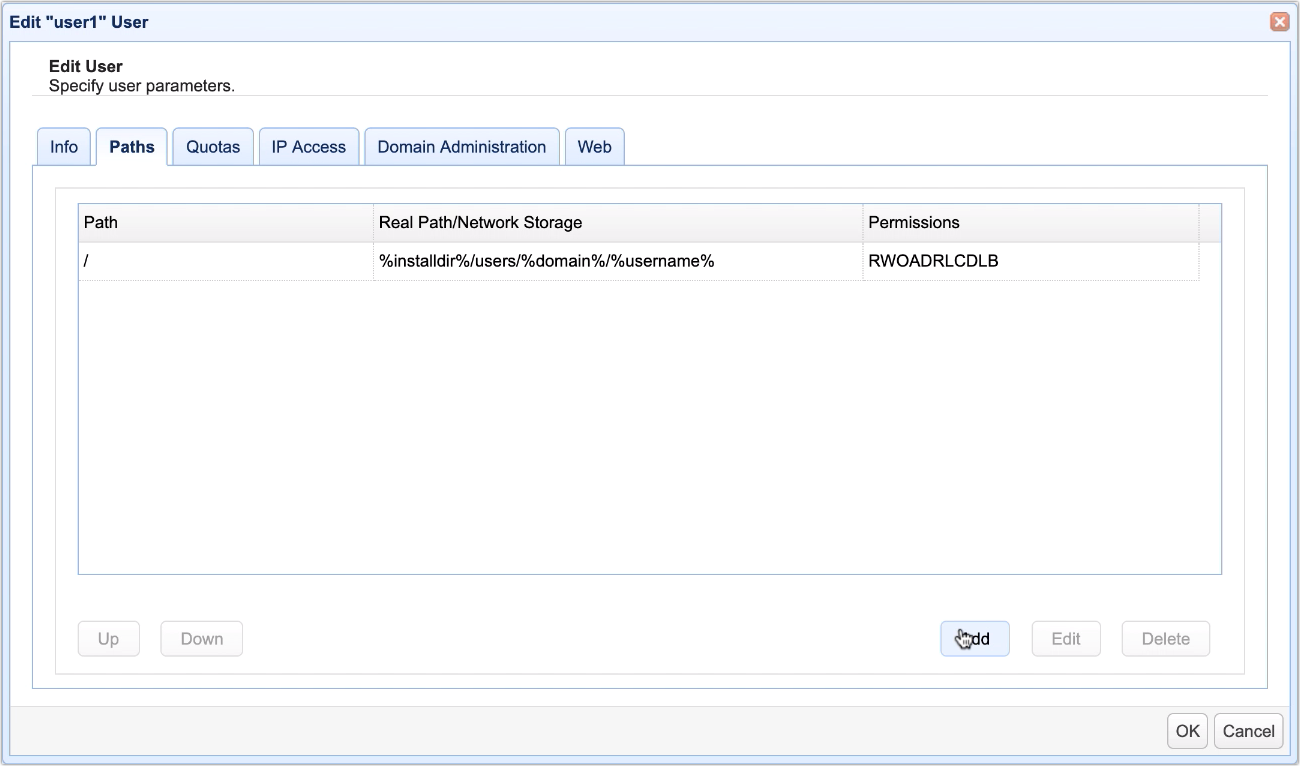
After that, go to the Paths tab and click the Add button to add a new virtual path.
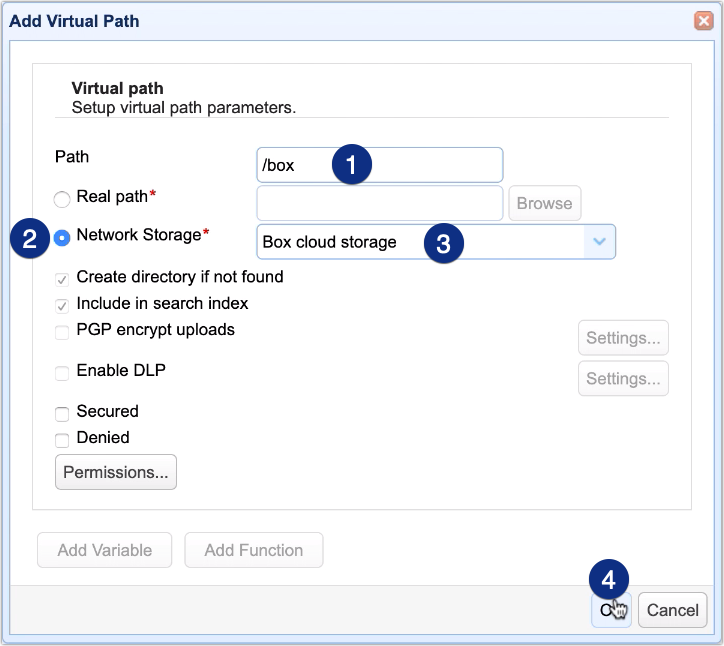
Define a virtual path. In this example, we'll just use '/box'. This means, when this particular user logs in, he/she will see a folder named 'box' underneath his/her root virtual path.
Next, let's map this virtual path to the Box network storage object we created earlier. Tick the Network Storage radio button and then select the name of the network storage object we created earlier from the drop-down list.
Click OK when you're done.
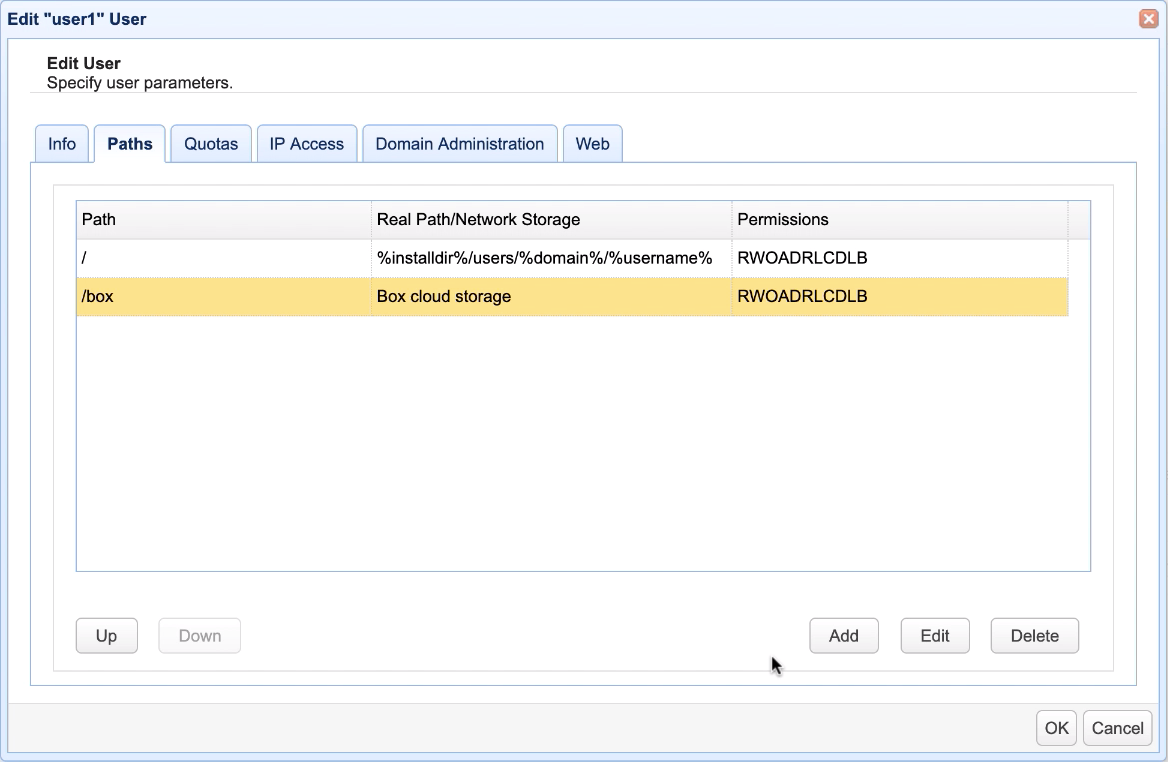
Click OK again to get back to the main screen.
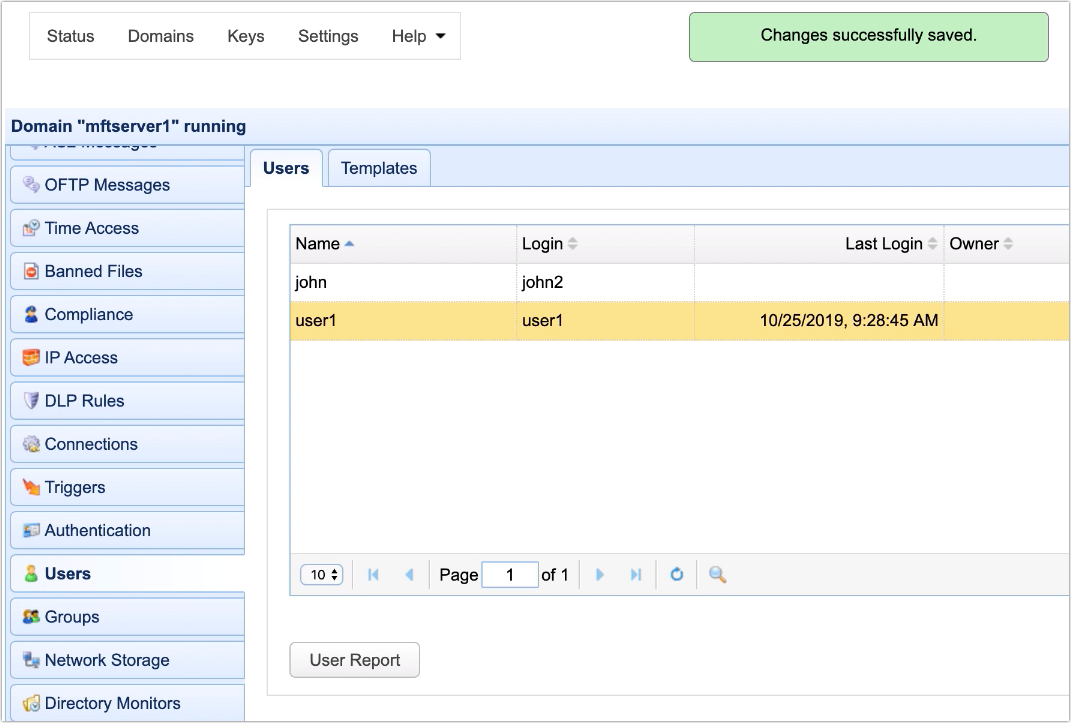
Let's now see how this looks like from an end user's perspective.
In my case, I have an HTTP web file transfer service running on my JSCAPE MFT Server instance. So I launch my web browser and login using the user account in which I created a virtual path earlier.
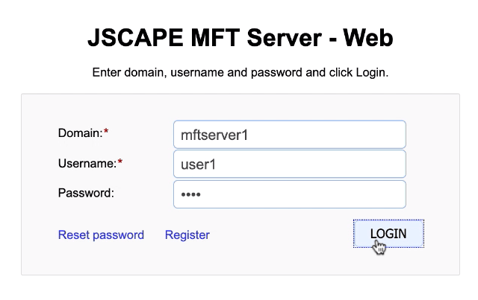
And, true enough, I see a folder named box under this user's virtual root path.
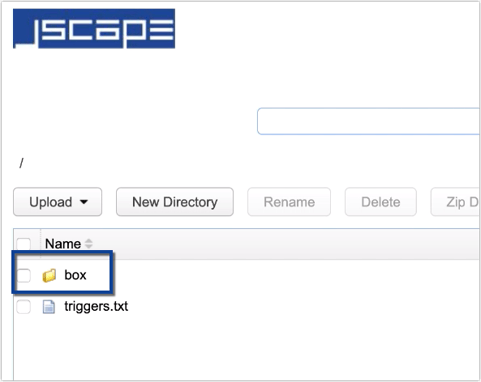
Let's navigate into that folder and try uploading a file to it. That uploaded file will be automatically stored onto Box.
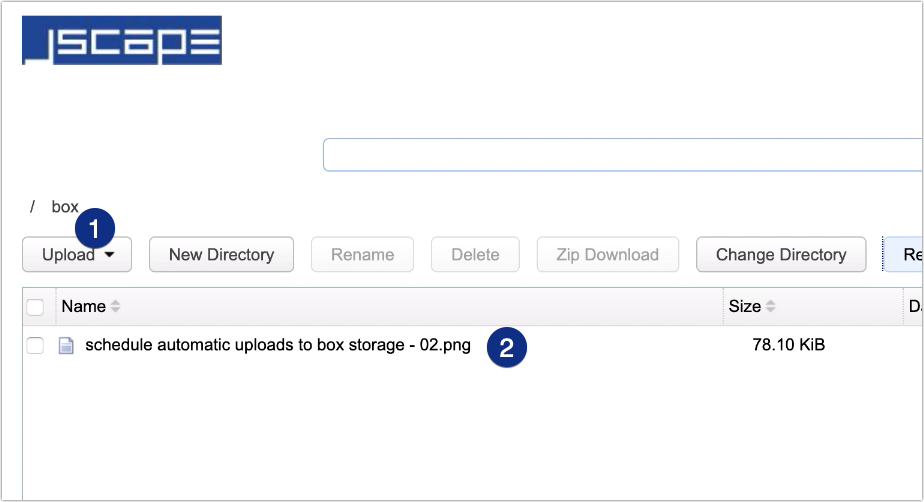
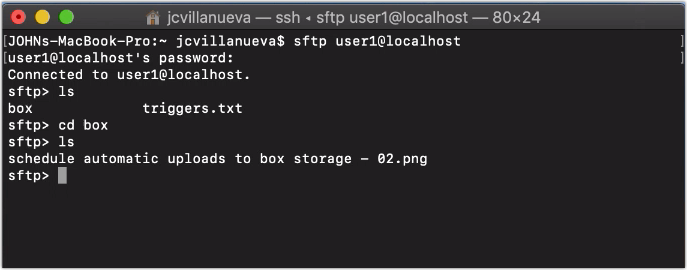
That virtual path that maps to Box can be accessed by user1 regardless of the file transfer protocol used. So, for example, if I login using SFTP, I can also see the file I uploaded earlier.
That's it. Now you know how to set up JSCAPE MFT Server so that it can use Box as a cloud storage.
Try it out
You can try this out yourself by downloading the FREE, fully-functional Starter Edition of JSCAPE MFT Server.