
Overview
With JSCAPE's online FTP client, known as AnyClient Web, you can transfer files securely even if you don't have your laptop with you or if you simply haven't installed (or can't install) an FTP client. All you need is a regular computer, a Java enabled web browser, and of course an Internet connection.
What is AnyClient Web?
This web-based FTP client is actually an online version of AnyClient, JSCAPE's free file transfer client. Because this online version shares the same code as the locally-installed AnyClient, it can do practically everything that AnyClient can. Like it, AnyClient Web supports a wide range of standard and secure file transfer protocols like FTP, SFTP/SSH, FTP/Implicit SSL, FTP/SSL (AUTH TLS), WebDav, Amazon S3 (HTTP), Amazon S3 (HTTPS) and AFTP. Other than having a Web browser in the background, it even looks exactly the same.
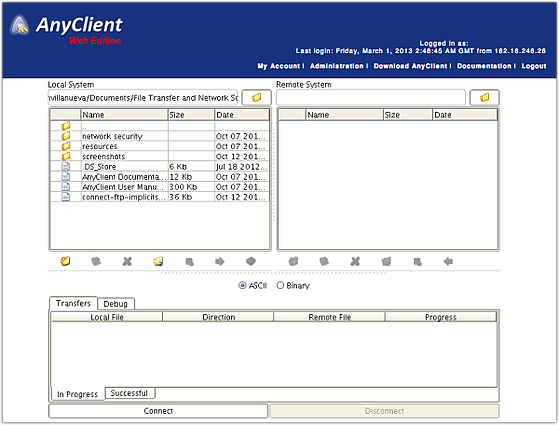
Here's the main screen of the web-based AnyClient:
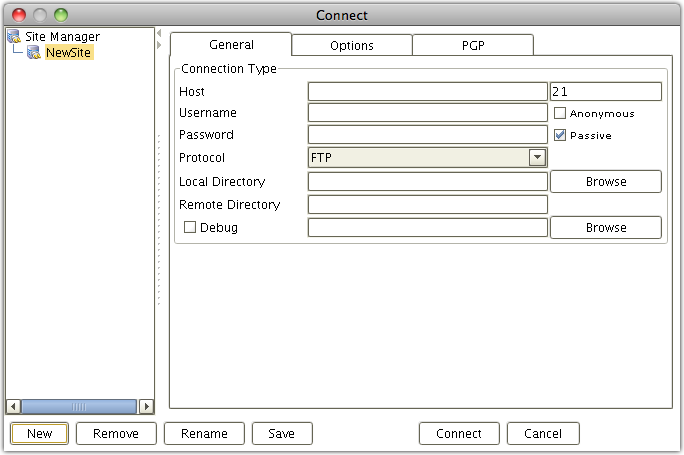
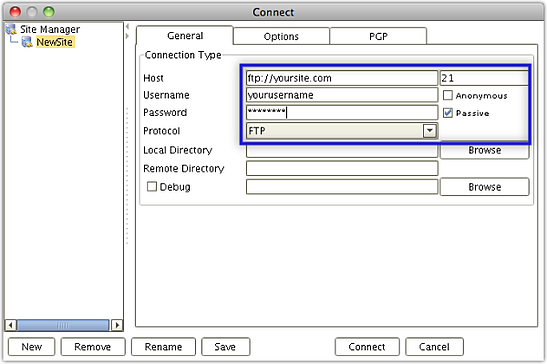
Here's a screenshot of the Site Manager, where you setup your connections:
Again, it looks exactly like the locally-installed edition. One of the advantages of using the online edition is that you don't have to perform any upgrades. JSCAPE will do that for you. That means, the latest features will always be at your fingertips.
A commercial version of AnyClient is available for companies who want to embed the applet into their corporate websites, thus providing a corporate portal through which file transfers can be performed. This arrangement is suitable for employees who have limited technical know-how because they don't have to install anything.
How to upload files using AnyClient Web
Let me show you how easy it is to perform an FTP upload using AnyClient. I will assume you already have a running FTP server to connect to. If you don't have one, try JSCAPE MFT Server.
Ok. Let's get started. Go to the free AnyClient page. At first, your browser might ask your permission to allow the applet to run. Allow it and then wait while the applet loads. You should see something like this at first:

Once it loads, click the connect button.
When the next window appears, do the following:
- Click the New button
- Give the site (or connection) a descriptive name.
- Enter your server's host/IP address and port number.
- Enter your username.
- Enter that username's corresponding password.
- Choose a connection type (in our case, it's just FTP).
- Click the Connect button.
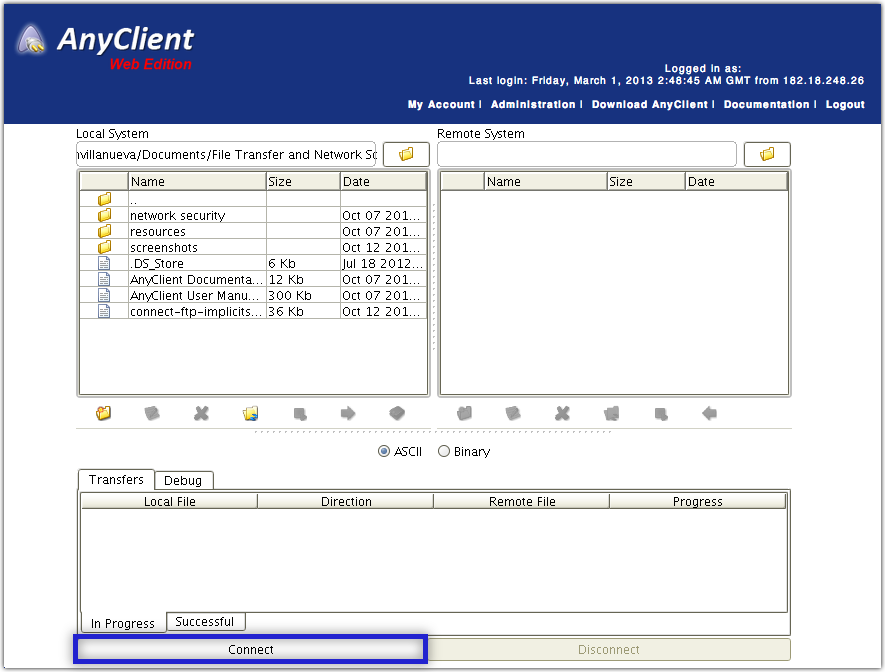
If your FTP server is running and you entered the correct information, the next screen should show something like this.
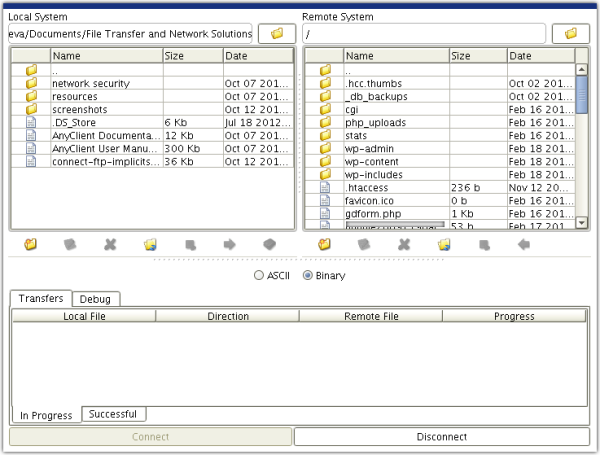
It's actually the main screen of AnyClient, but with the right panel already activated. So the left screen is your local directory and the right screen is the remote directory.
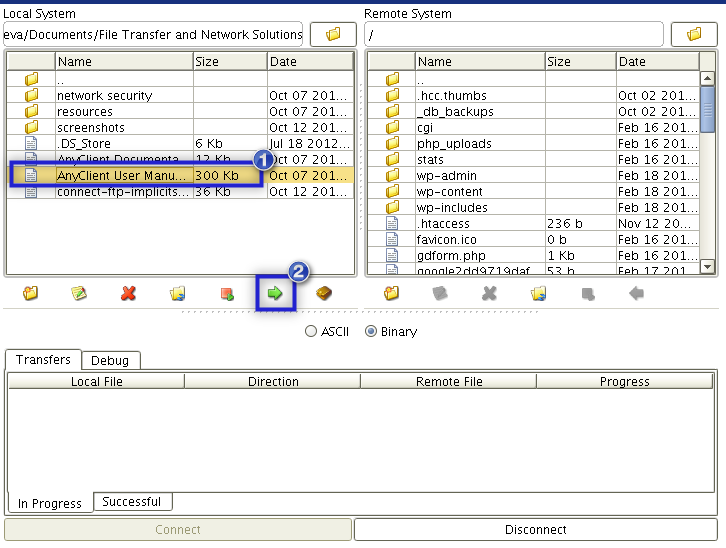
Navigate to the folder in your remote system where you want the uploaded files to be stored. Next, select the file(s) in your local directory that you want to upload. Finally, click any of the upload buttons (highlighted in the screenshot). The client should then commence upload.
Once you're done, click the Disconnect button.
Summary
As you can see, it's so easy to transfer files using JSCAPE's online FTP client. See you again next time for another file transfer tip.
Downloads
Nothing to download. Just create a free account here.