How to Use Public Key Authentication with Partners | JSCAPE

Overview
Several months ago, we published a tutorial crafted to help network/server administrators prepare trading partners for SFTP automation. That article lacked one important feature found in SFTP - public key authentication. So today, we've devoted one full tutorial that focuses on that.
Assumptions
For this tutorial, we'll be assuming that:
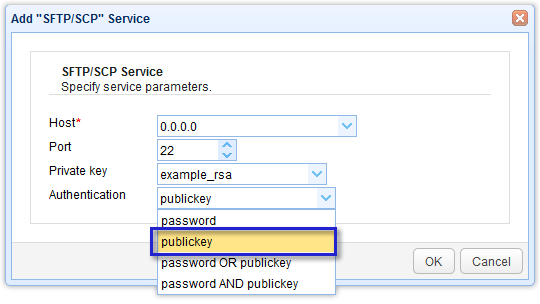
1. Your trading partner already has a running SFTP server with public key authentication enabled. On JSCAPE MFT Server, that's just a matter of selecting publickey upon adding the SFTP/SCP service;
2. You have a running SFTP server as well. If you don't have one yet, you can read the article Setting Up An SFTP Server; and
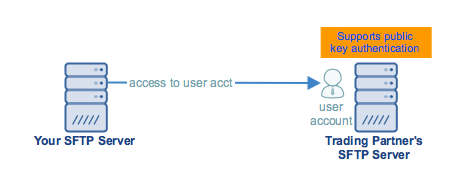
3. Your trading partner has created a user account on their SFTP server that you can use to login via public key authentication and upload files with.
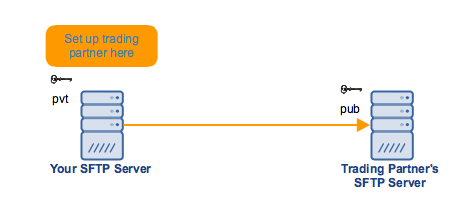
For the purpose of this tutorial, let's just say that user account is named John Smith.
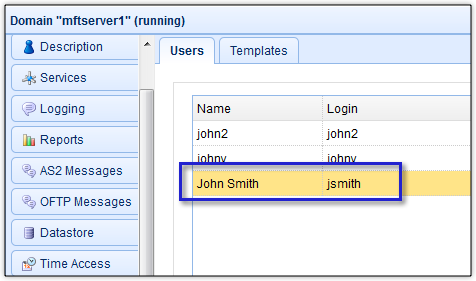
To visualize...
Now that we're done with the preliminaries, it's time to get into the meat of this tutorial. Let's start discussing the steps for setting up public key authentication using our SFTP server of choice, JSCAPE MFT Server. Even if you're not using JSCAPE MFT Server, the steps outlined here will still give you a general idea on how public key authentication is set up between other SFTP servers.
The general steps (except #4, which is exclusive to the JSCAPE MFT Server environment) are as follows:
1. Generate a public-private key pair and store the private key on your server
2. Export the public key
3. Import the public key into your trading partner's SFTP server
4. Set up a trading partner object on your server
If you prefer to see if live, request a free trial. Otherwise, let's begin.
Step 1: Generating an SFTP public-private key pair
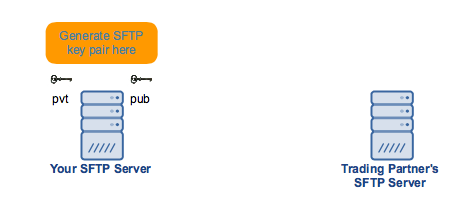
We won't discuss this thoroughly here since we already covered this topic in detail in the post 2 Ways to Generate an SFTP Private Key. We encourage you to read that first, particularly section 1 ("Obtaining an SFTP private key via the Key Manager"). Note that, to be consistent with this example, just change the key alias to tp-jsmith-key and the Common name to John Smith.
Remember to keep the private key file (.prv) in a secret location (dont' forget where you hid it!). Remember the key file's password as well. You'll need those later.
Step 2: Exporting the public key file
Once you've generated the key and saved the private key file, the next thing to do would be to export the corresponding public key file. To do that, just select the client key you created earlier (e.g. tp-jsmith-key), click the Export button, and then click Public key.
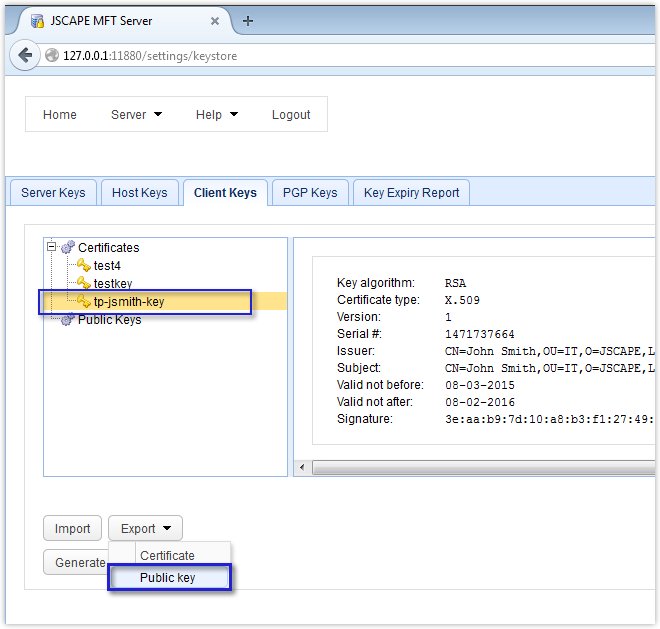
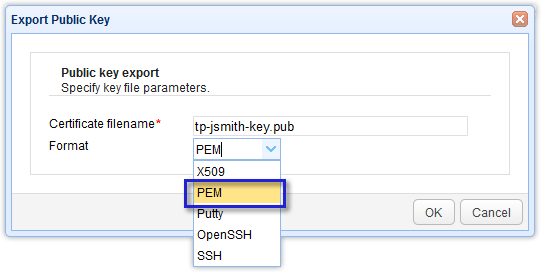
You will then be asked to specify the filename and the format. Enter your desired filename (or retain whatever was suggested) and then select an appropriate format. In our example, we're using the PEM format. However, you can choose other formats like OpenSSH, SSH, and Putty, depending on which format is supported by your trading partner's SFTP server. Better inquire first before exporting. Otherwise, you might encounter problems later.
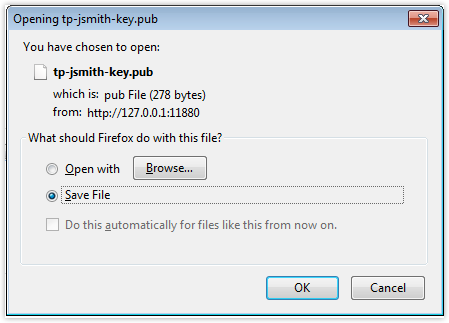
After clicking OK, you'll be presented with a dialog containing two option buttons. Select the option button labeled Save File. This will save the public key file on a local directory (usually the Downloads folder). You'll need to copy this file to your trading partner's SFTP server. Their server will then use it to authenticate your private key during the login process. It's just a file, so you can email it or transport it via a USB stick or any portable storage device.
Step 3: Importing the public key file into the trading partner's server
This step is supposed to be performed by your trading partner's server admin but we'll just show it to you anyway to give you an idea what they'll be doing at their end after you send them that public key file. You'll also find this step useful if you want to do the reverse, i.e. apply public key authentication on their server when they connect to yours.
The GUI shown here is still JSCAPE MFT Server but note that this will really be carried out at the trading partner's side.
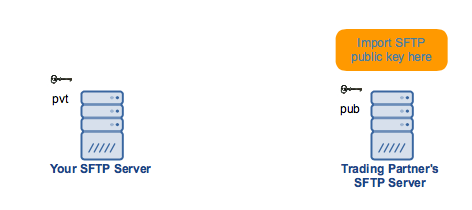
As soon as your trading partner's server admin receives your public key file, he will import that file into their company's SFTP server.
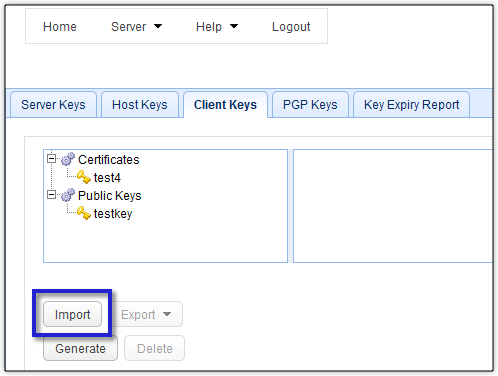
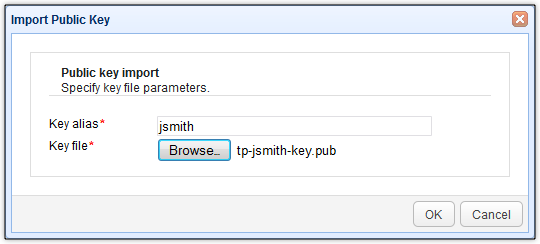
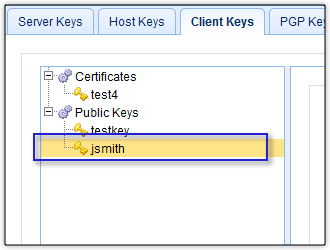
This is now the newly imported public key file.
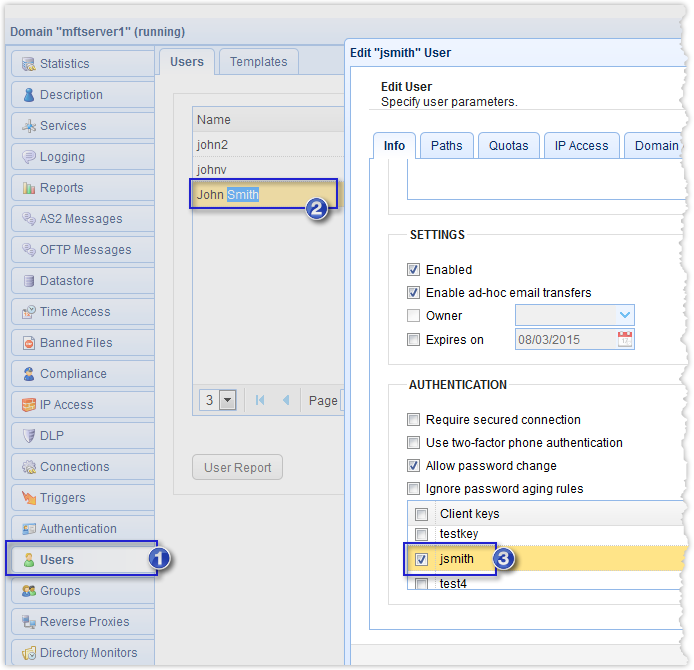
The process doesn't end there. Your trading partner's admin would then have to associate that public key file with the user account assigned to you for trading partner transactions. If you recall, for this particular example, that user account was John Smith. That's what you're seeing below.
Now that the public key file import process is complete, it's time to go back to your own server and set up a trading partner object there. Read the article Preparing Trading Partner Servers For SFTP Automation to understand the concept of trading partner objects in the context of JSCAPE MFT Server.
4. Setting up a trading partner object
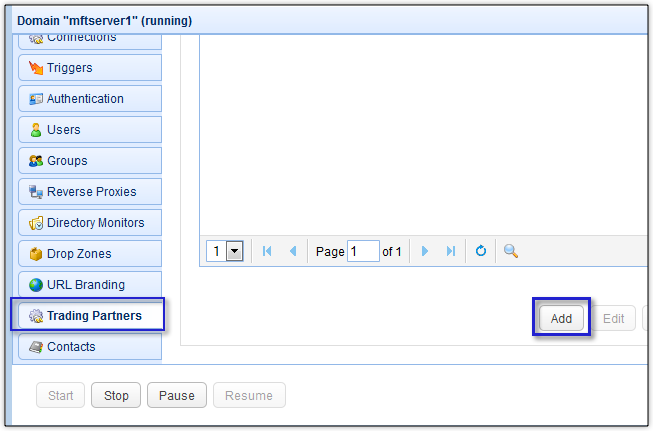
Go to your Trading Partners module and click the Add button to add a new trading partner.
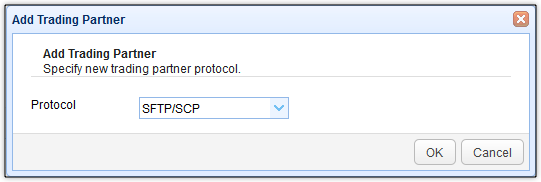
Since we're using SFTP in this tutorial, select SFTP/SCP for the trading partner protocol.
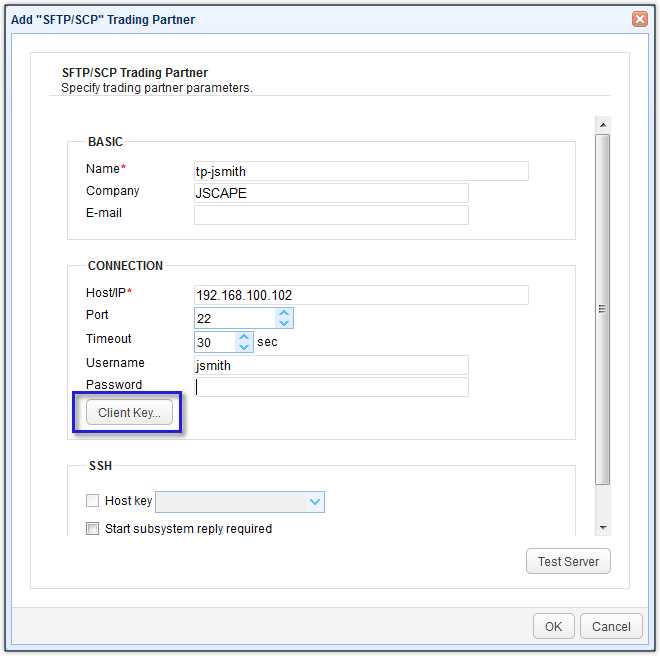
Enter pertinent information such as the:
- Name of the trading partner,
- Name of the Company,
- Host/IP address of the trading partner's SFTP server,
- Username,
- Password - if your trading partner's SFTP server is configured to authenticate purely using keys, just leave this blank. However, if it's configured for 2-factor authentication, i.e., passwords and keys, enter the appropriate password here
After that, click the Client key button.
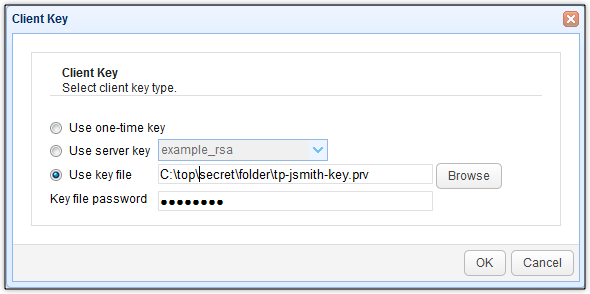
Select the Use key file option and browse to the private key file you saved earlier. Enter the key file's password and then click OK.
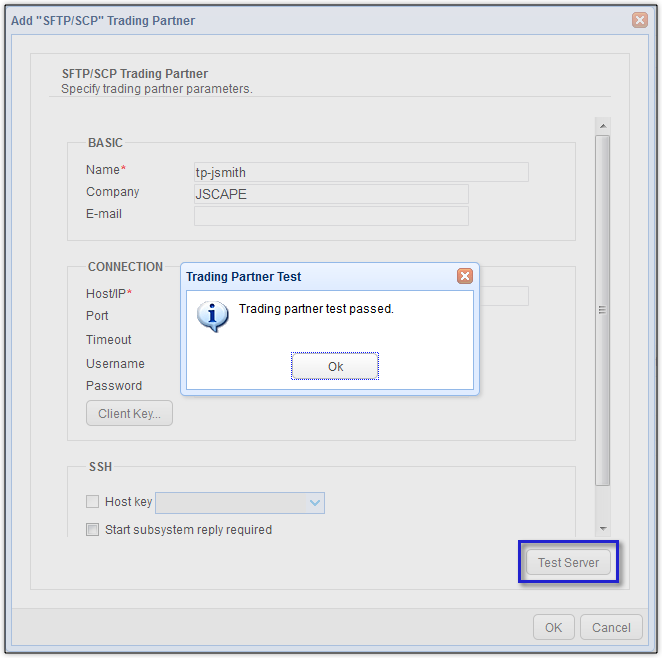
You can then run a test on this trading partner's connection by clicking the Test Server button.
If you see something like the message box shown below, congratulate yourself. You've now set up public key authentication with your trading partner. Good job!
Related posts
Setting Up SFTP Public Key Authentication On The Command Line
You Know It’s Time To Implement Server To Server File Transfer When..
How To Set Up a Server To Server File Transfer
What Is Client Certificate Authentication?
Get started
Want to try out the tutorials on this blog? Request a free, fully-functional evaluation edition of JSCAPE MFT Server now.